The theatrical showing of Jungkook’s ‘I Am Still’ was announced right as I was learning to embroider. And, while I had always wanted to learn to embroider, a large part of my motivation to finally delve into the art was to find a unique BTS freebie I could make my own. JK’s documentary was both a great inspiration and an opportunity for me to try to make my idea a reality. (More like give me a deadline to kick me in the butt and actually get started.)
If you want to read about my adventure into bookmark-making, I detailed the whole, mistake-filled story here. It took me a bit of practice and a couple of failures to get a Golden bookmark I was happy with and I’m really excited to share it with you.
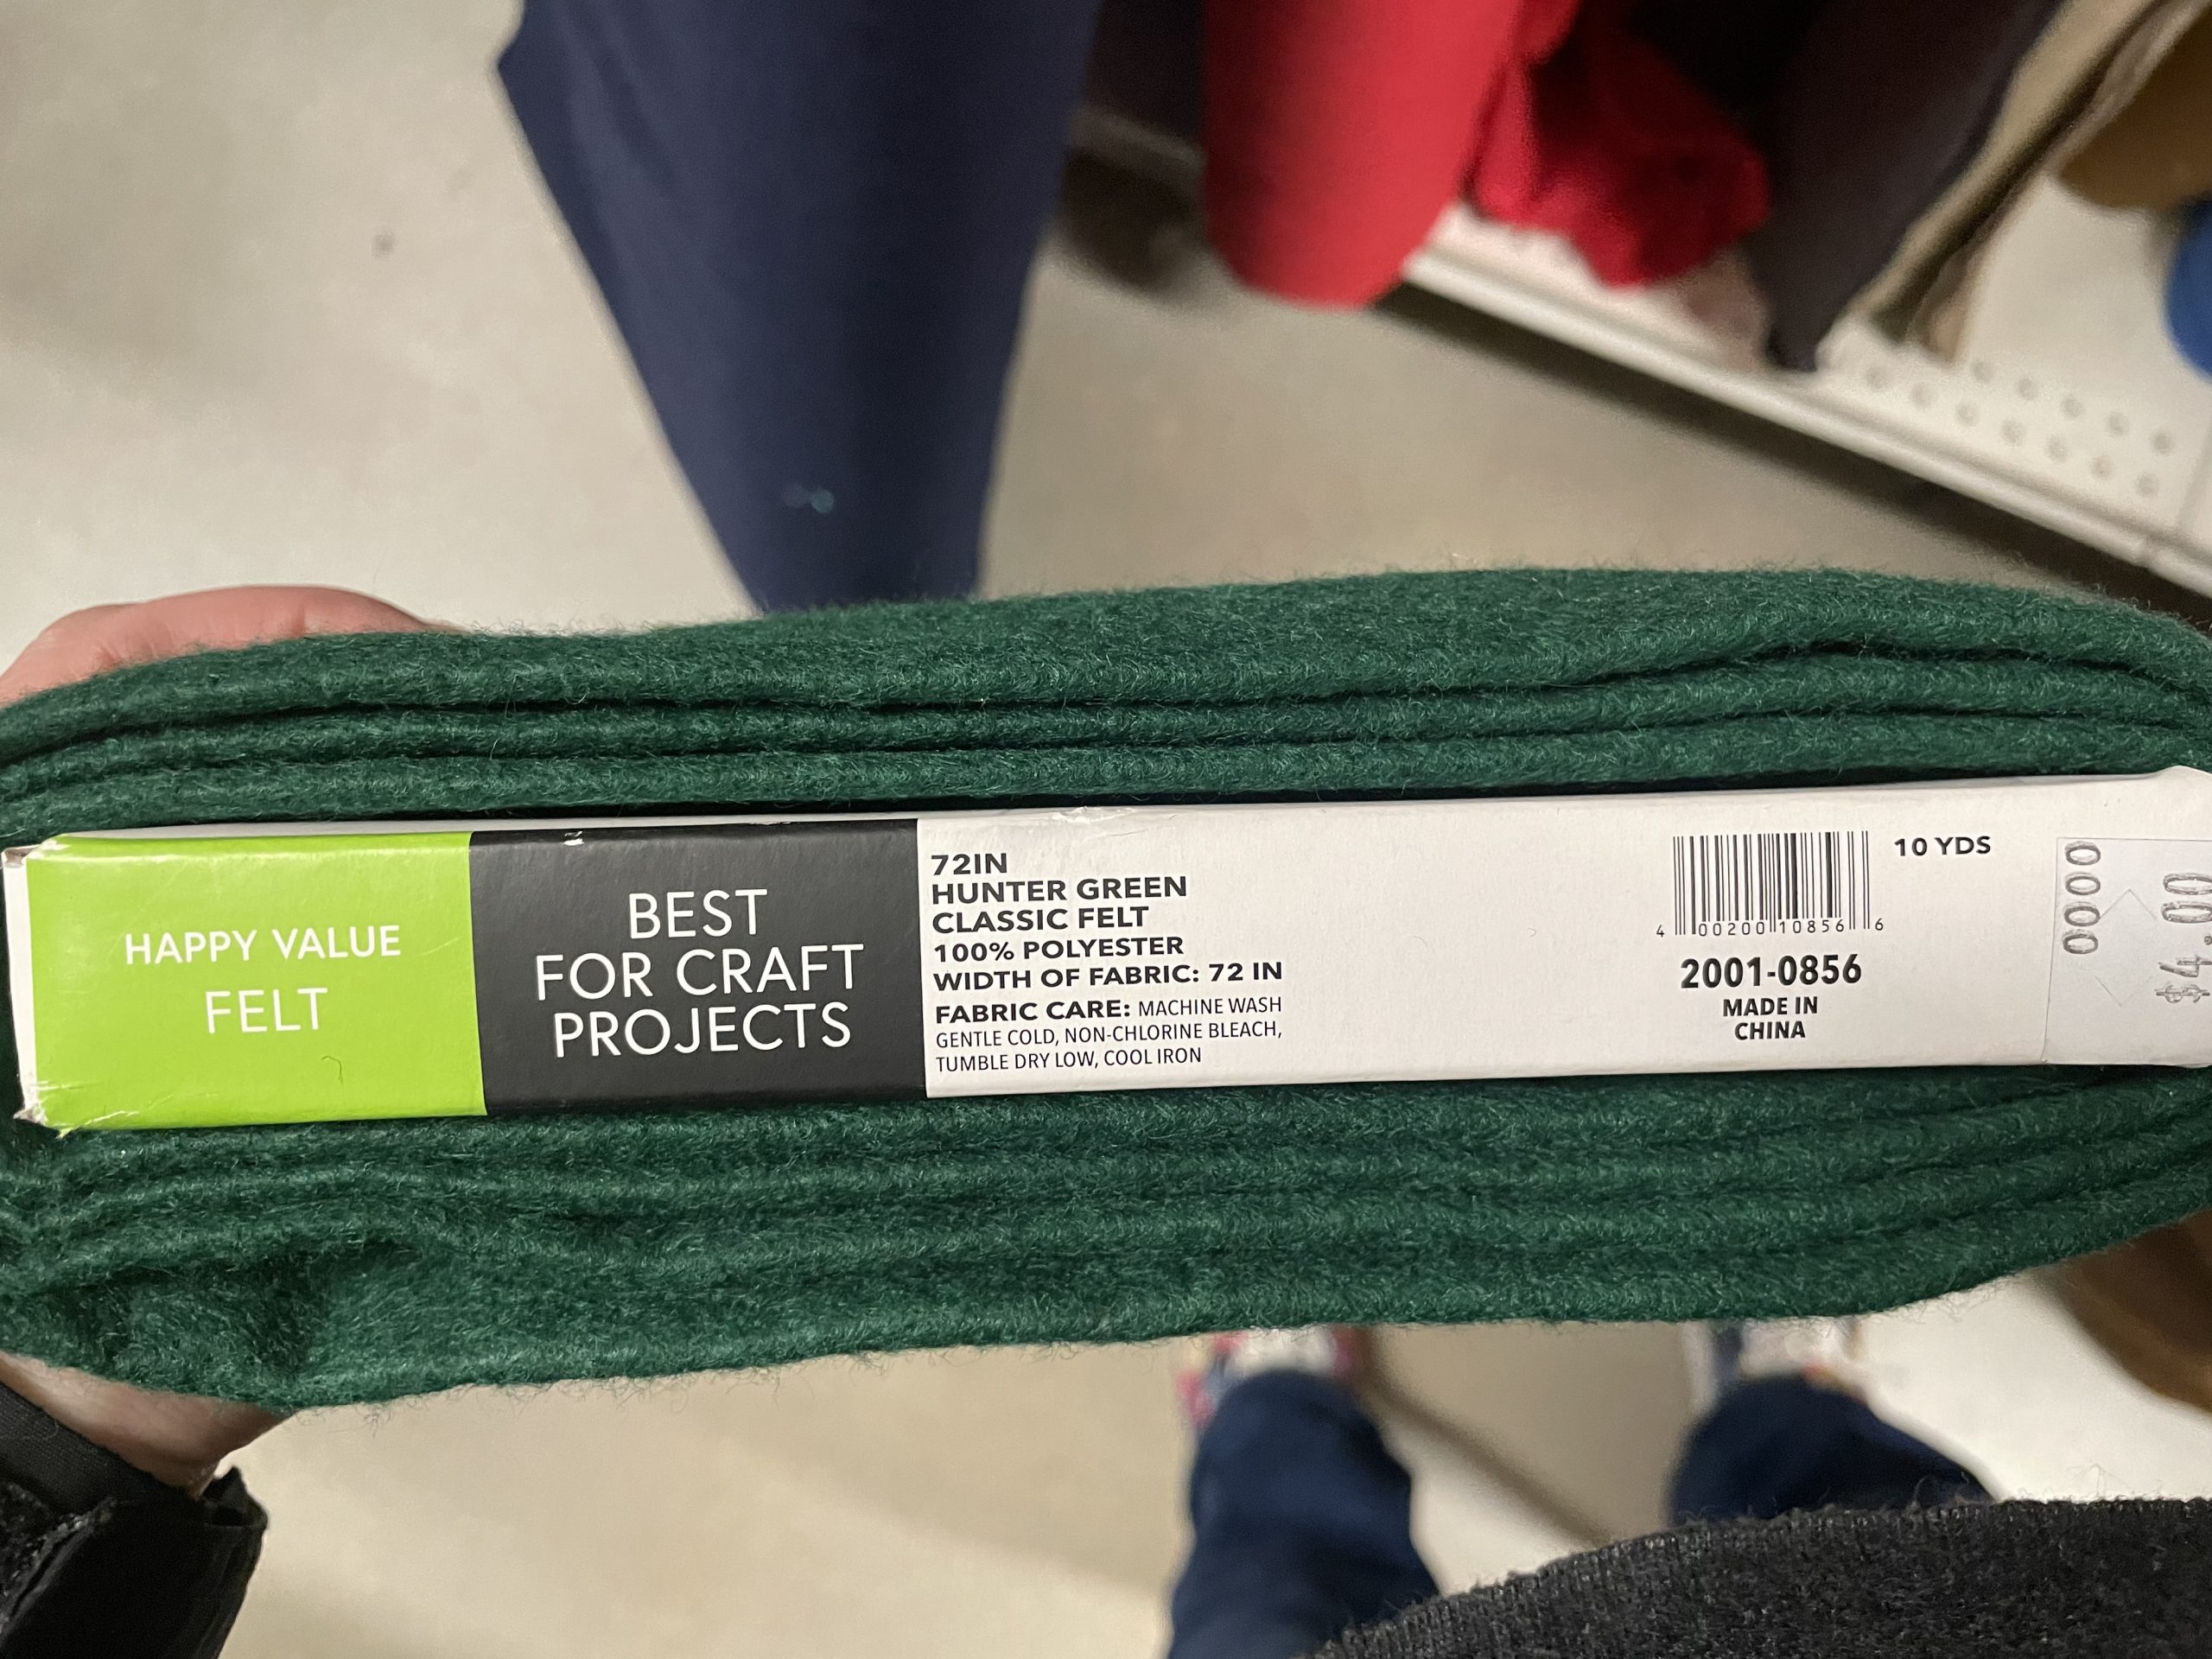
Before you get started — if you haven’t read my post about everything you need to know before making your own felt bookmarks, head on over there. In it, I detail all the tools I use, the type of stitches you can expect to see, where to get felt, and more. Hopefully, that post becomes a helpful tool for you as you start this Golden bookmark project.
Downloadable patterns & guide
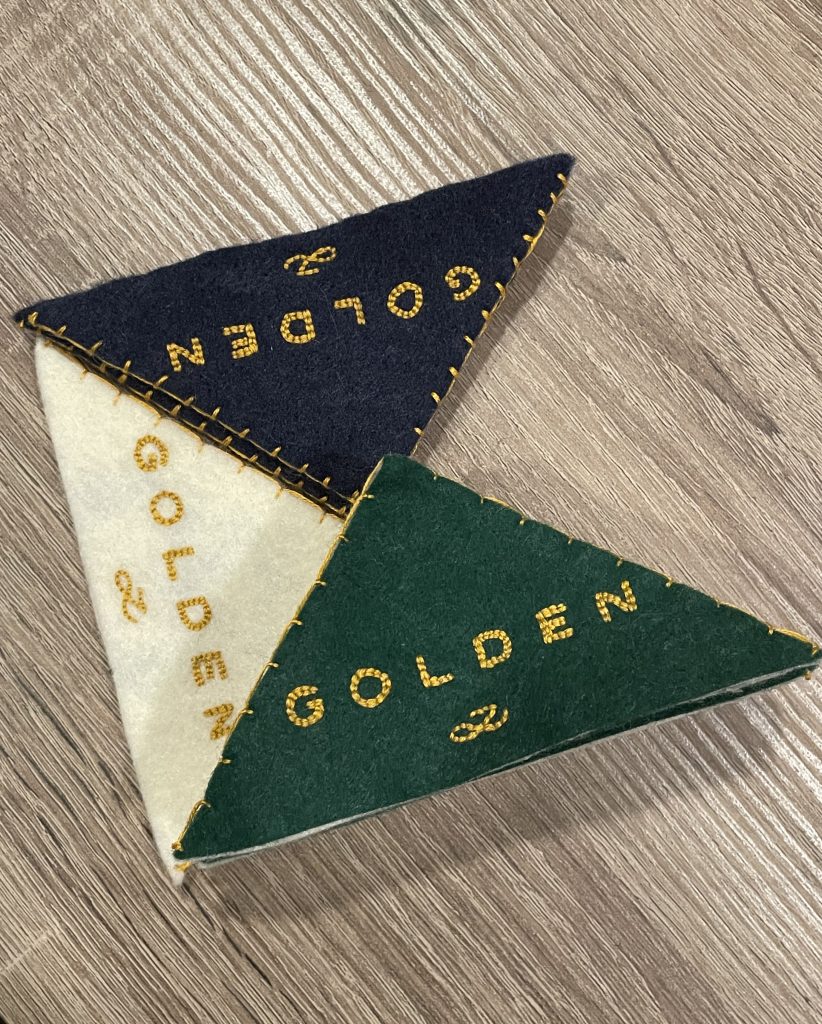
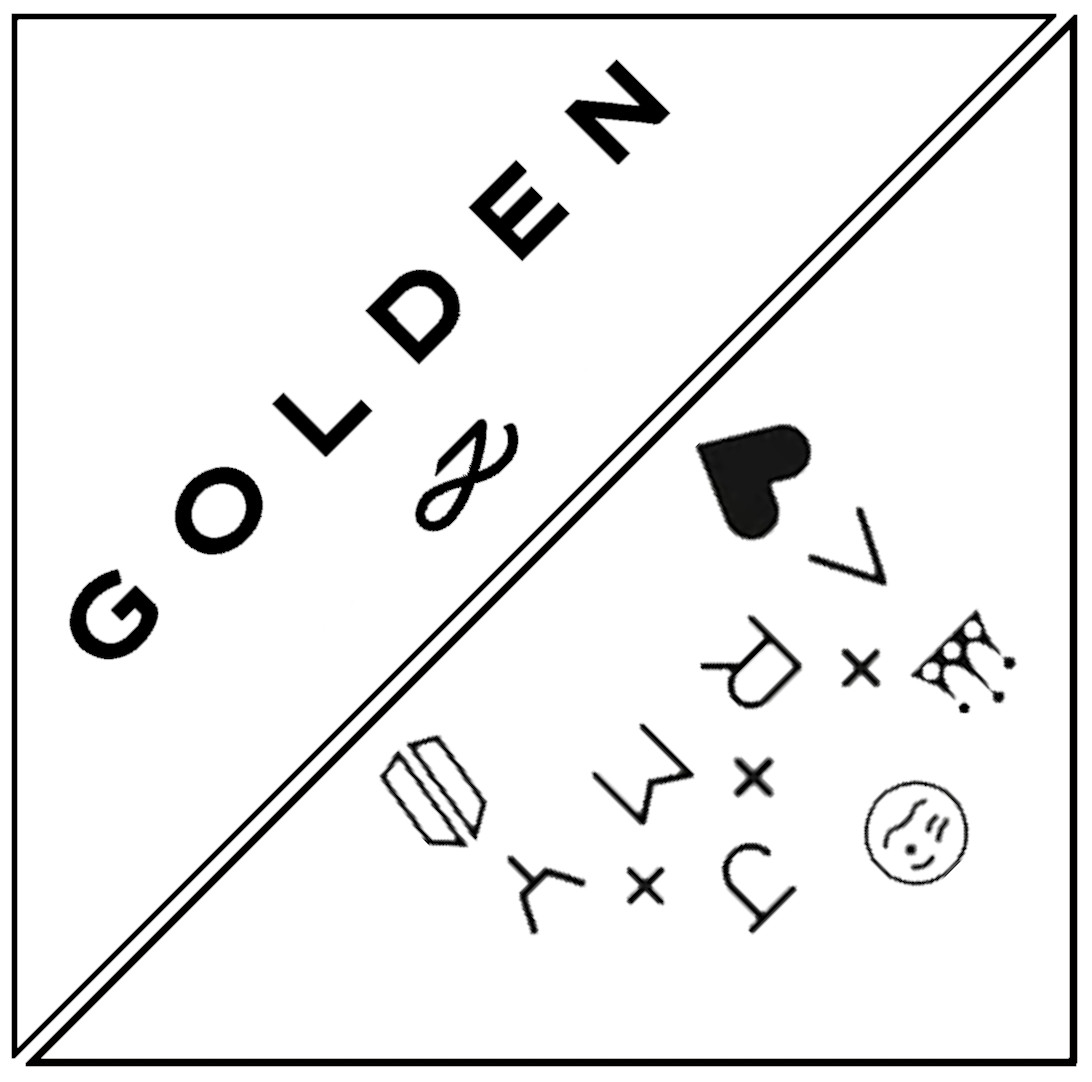
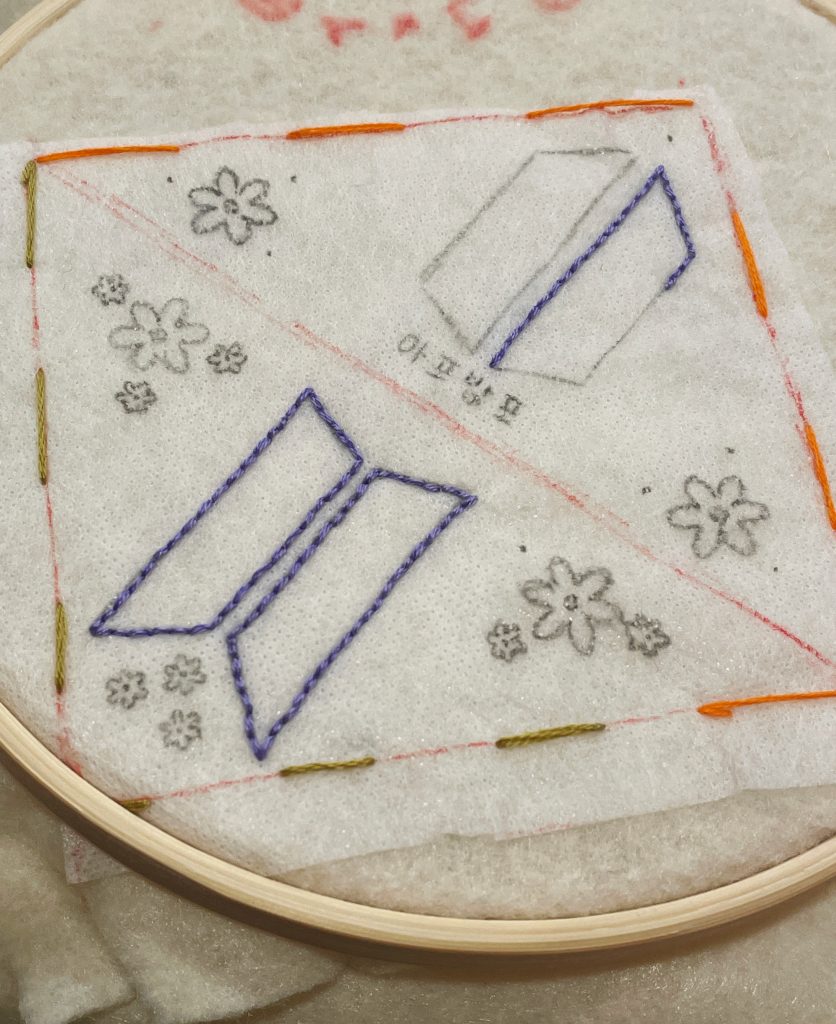
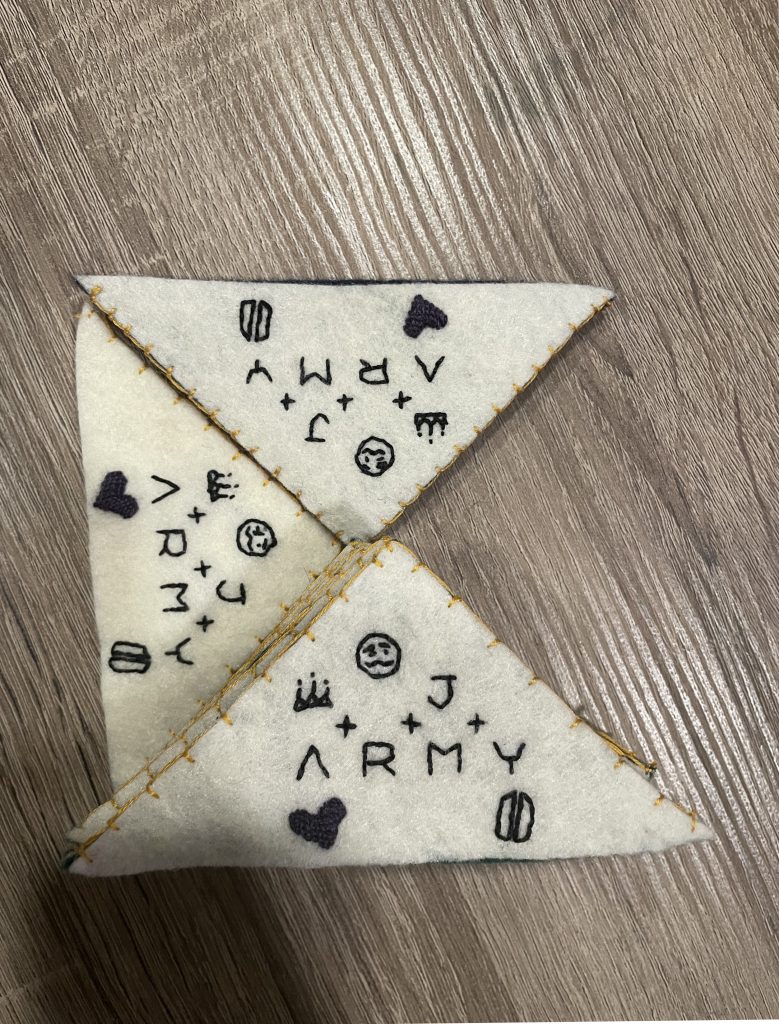
I have loved the Golden album art and packaging since the moment the first promotional photos dropped. While the photos are (whewwwww) sensational, I also adored the album’s simplicity and classiness. I wanted to capture a bit of both those attributes when I designed these Golden bookmarks. One side is a rough take on the physical album cover, and the other is a replication of Jung Kook’s hand tattoos.
I’ve provided several files here so you can make your own Golden bookmark. First, a color and stitch guide in PDF form. Then, several file variations of the pattern so you can download and use it how you want. This includes both a singular pattern for the whole bookmark, and a separate pattern for each side in case you want to do different colors for your sides. (Like the navy and green examples I have).
XCF files are specifically for Gimp, where you can edit how you please. While jpegs and PDFs can be used anywhere.

I am not putting any copyright notices or warnings on these because I, obviously, don’t own either logo and I certainly don’t claim any rights to JK’s tattoos. But, please, only use these patterns for personal use or for freebies, kay? None of us want that BigHit smoke. And, I’d appreciate it if you didn’t attempt to profit off something I’m sharing for free. 🙂
Golden bookmark step-by-step
Since this was the first BTS-inspired bookmark I ever designed, I feel like it is pretty beginner-friendly. Hopefully, the guide I provided is helpful. Just in case you’d like further guidance, I will go through several of the steps I took in making my Golden bookmark.
Materials
- One of the patterns provided
- DMC embroidery floss in the colors 3852, 310 & 32. To color match to another brand, you can use this website or you can use this website to convert the thread color to RGB values to find the closest match in another brand.
- A transfer method. I use wash-away stick ‘n stitch for all my bookmark projects.
- If you go this route you will need a printer and scissors. I like to sew my pattern on for extra sturdiness. You will need extra floss if you would like to go that route as well.
- To wash away the pattern, you will also need warm water. (I also use a bowl and a metal chopstick)
- Medium-sized needles (5 or 6) and a large-sized needle (3).
- Embroidery scissors (or any small scissors) & fabric scissors
- An, at least, 4-inch hoop, if you want to use a hoop.
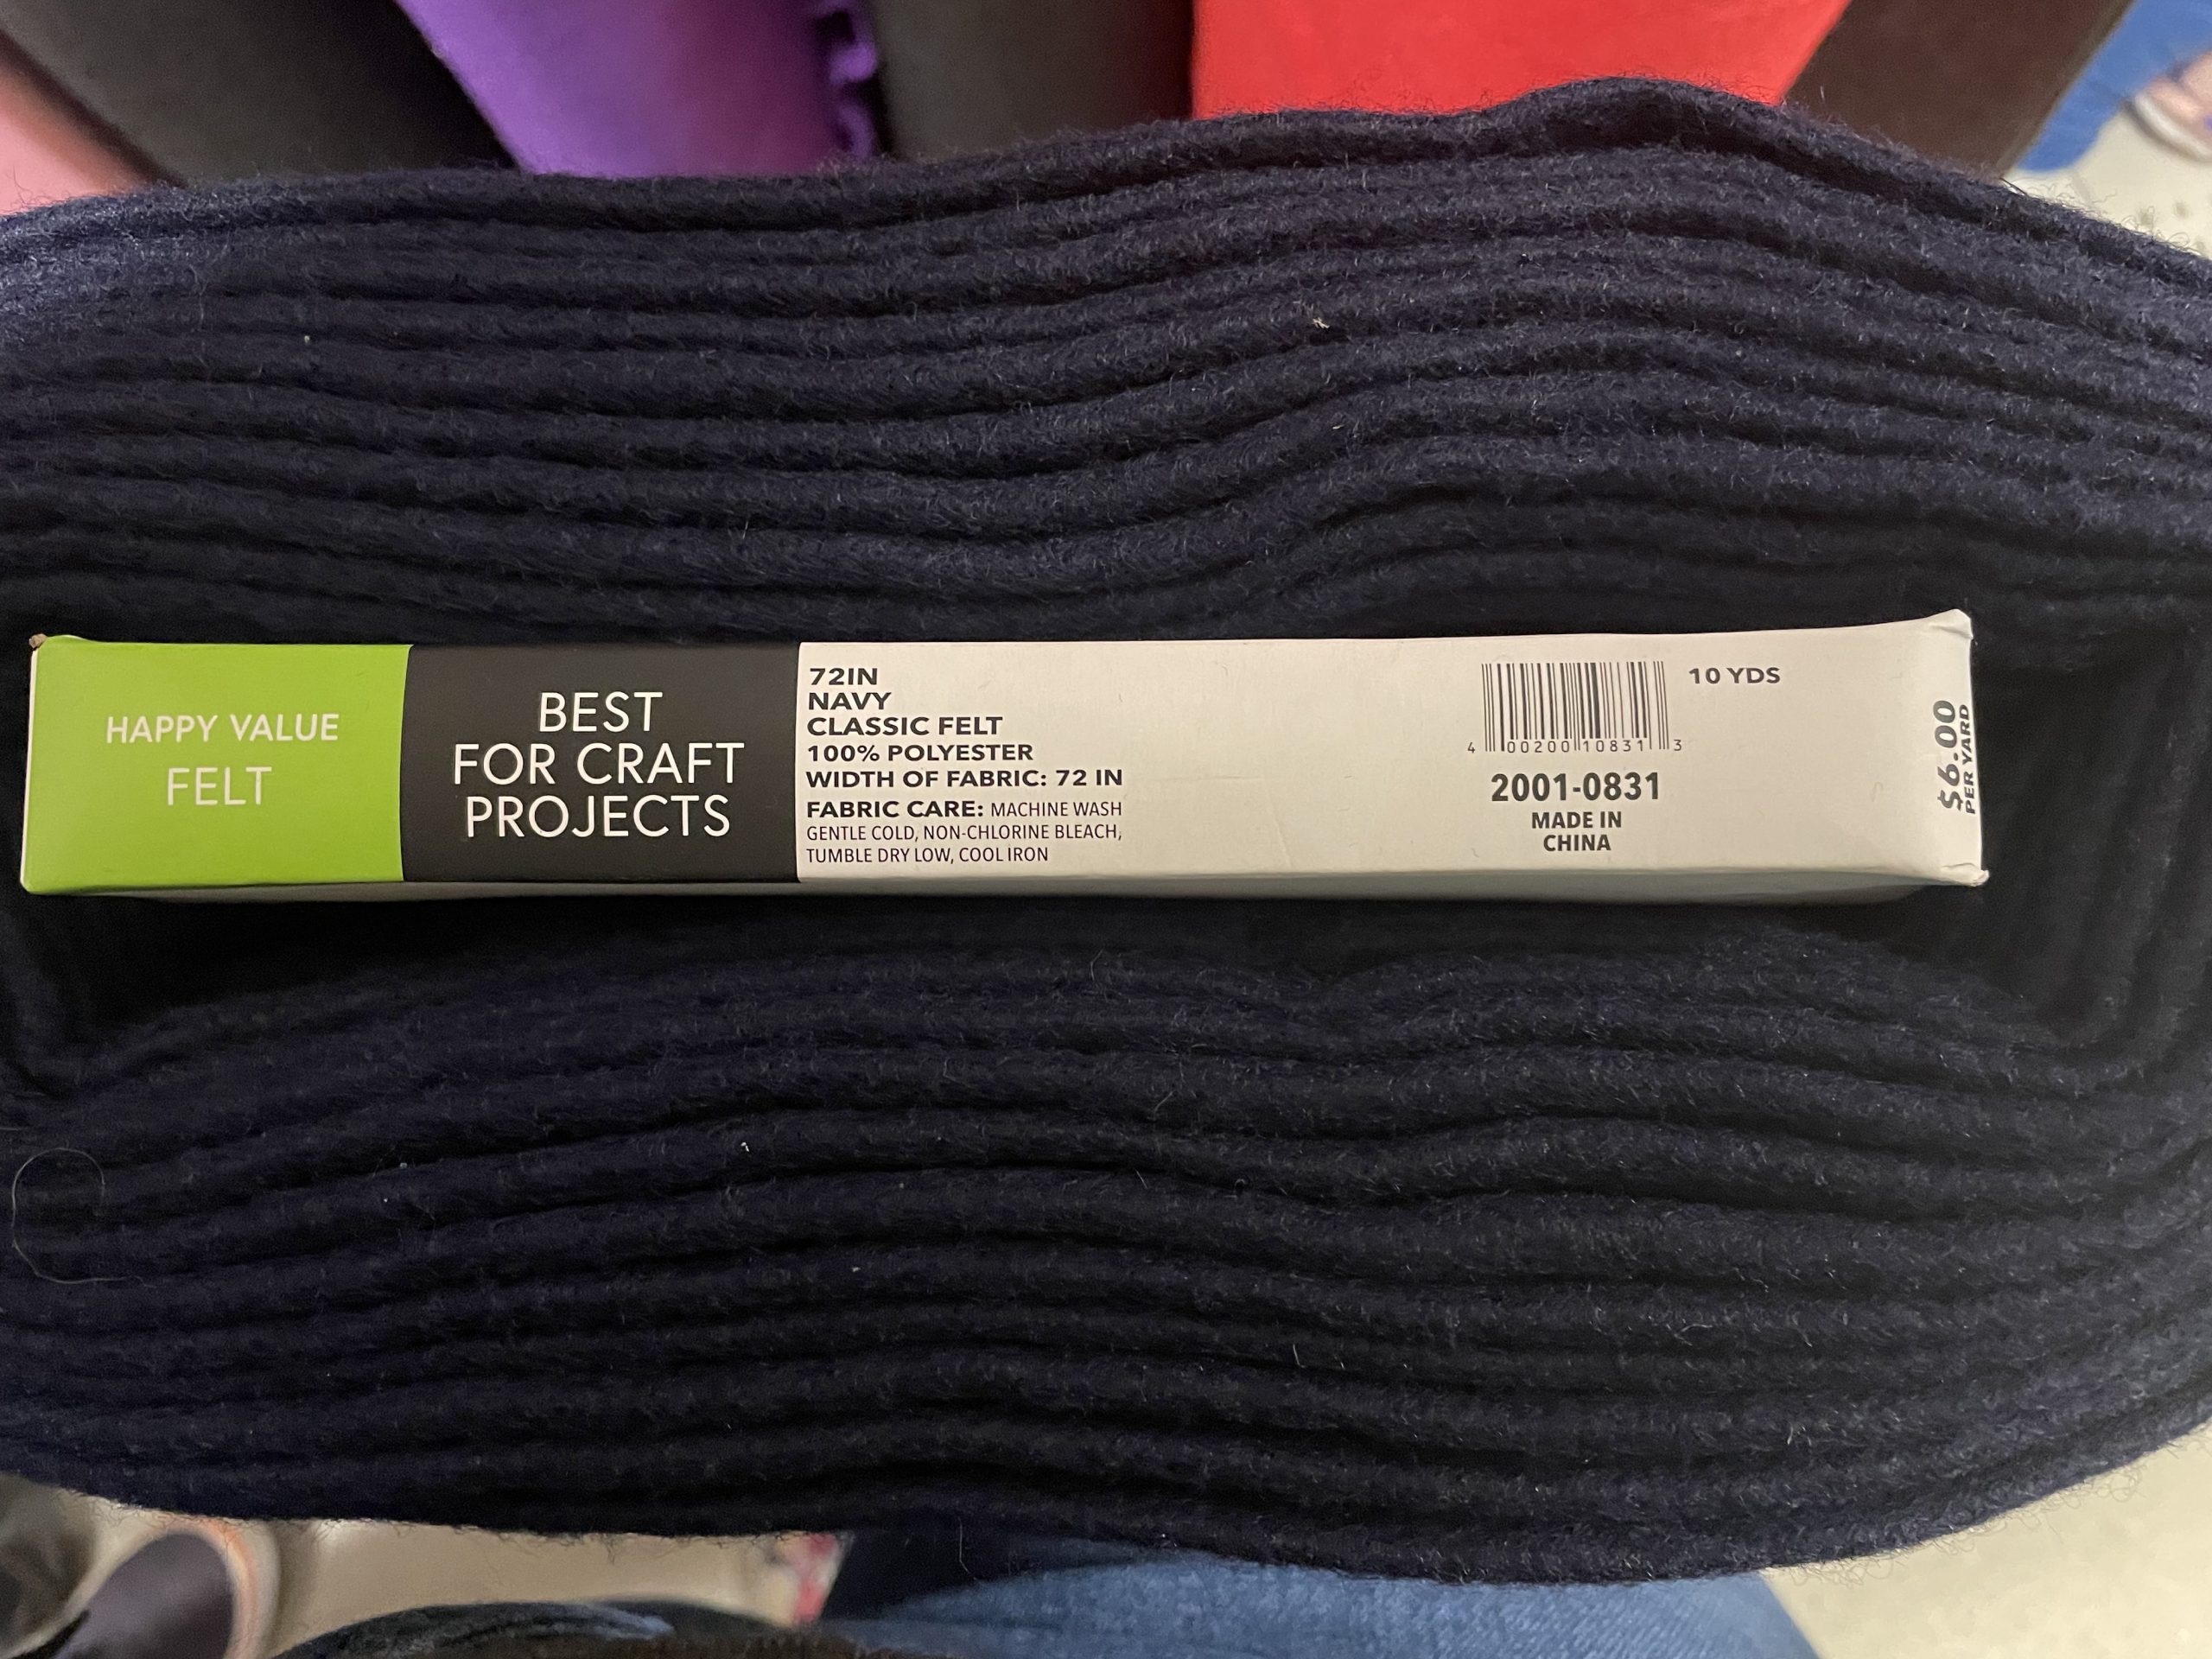
- At least a 4-inch x 4-inch piece of felt in your chosen color.
Since there are three different versions of the album, I like to make the Golden bookmark in all three colors. For the Shine version, I use a dark hunter green. I use antique white or off-white for Solid. And Substance uses a dark navy. The tattoos are always on the off/antique white. I find exact color matching incredibly hard with felt — even when buying from the same store consistently there are often shade variations by batch.
Getting Started
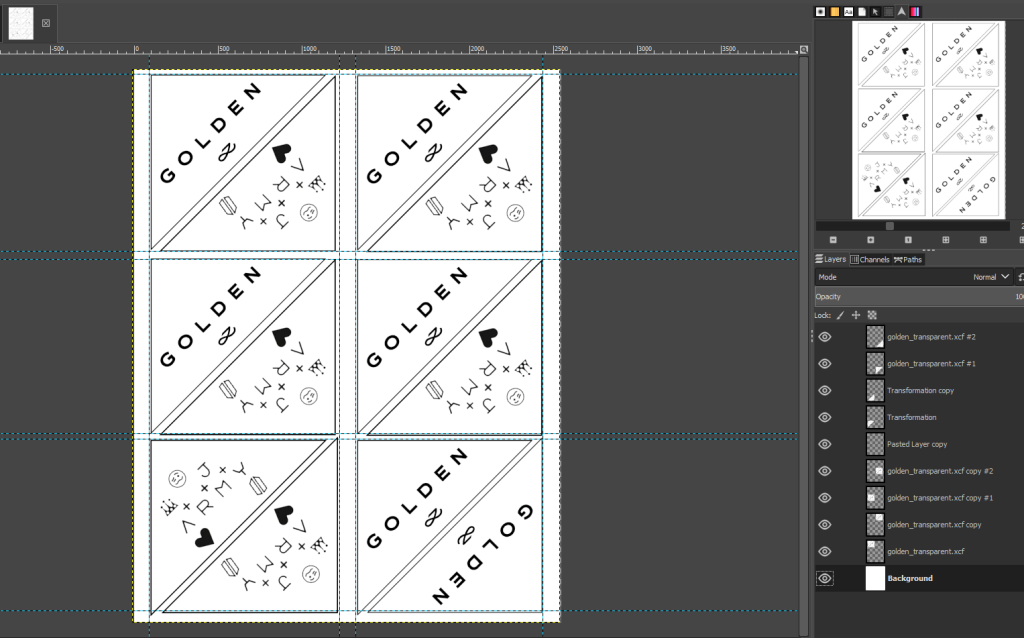
For me, the process always starts with setting up my pages to print the patterns on the stick ‘n stitch. I like to print out whole pages (just a normal 8 1/2 x 11) at a time since I make so many, as well as to avoid wasting any of the stick ‘n stitch.
You can see I print both the full bookmark on a single square as well as just the tattoos, and just the Golden. This is so I can make full white sets, tattoos on white separately, and goldens in either navy or hunter green. The margins and a little space between designs are there so I can cut them from each other. (Also to ensure the printer doesn’t cut off any of the design.)
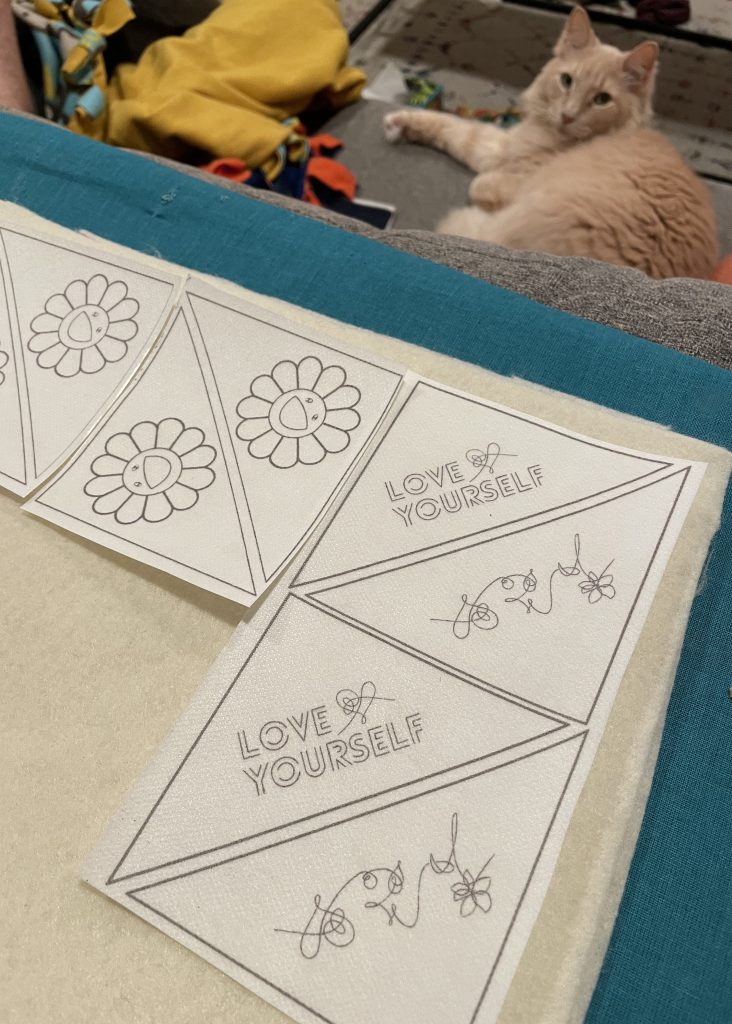
After I print the Golden bookmark designs, I let them sit for a few minutes so that the ink dries. Then I cut the squares I want to use out. I place the designs down on the felt on a flat surface to gauge where I want them before committing to sticking and then sewing them down, leaving a little space on each side. The sewing down and space are because I use a hoop to keep the felt taught while I embroider. If you want to cut your felt before you embroider, you can skip all these steps.
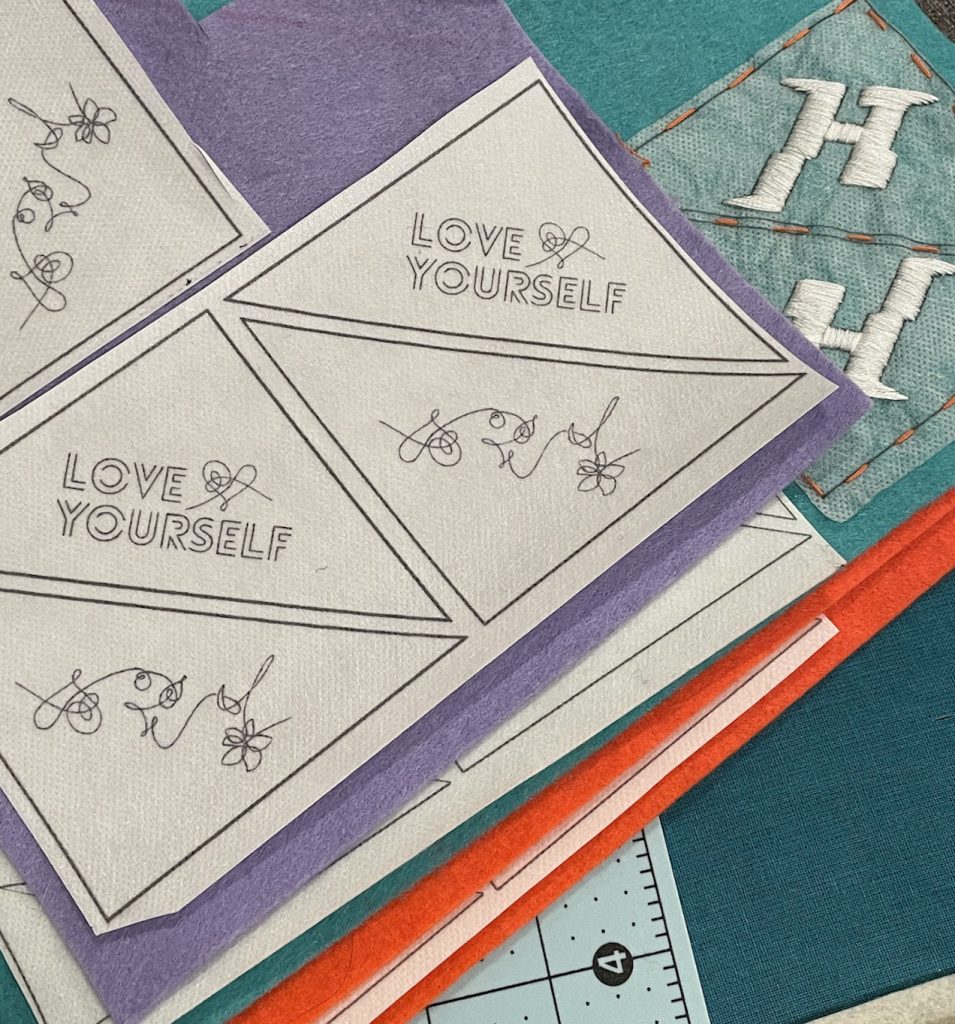
Once I have the patterns sewn down, I place them centered in the hoop.
Getting Stitching
For the Golden side, you’ll use DMC 3852 — a golden-colored embroidery floss.
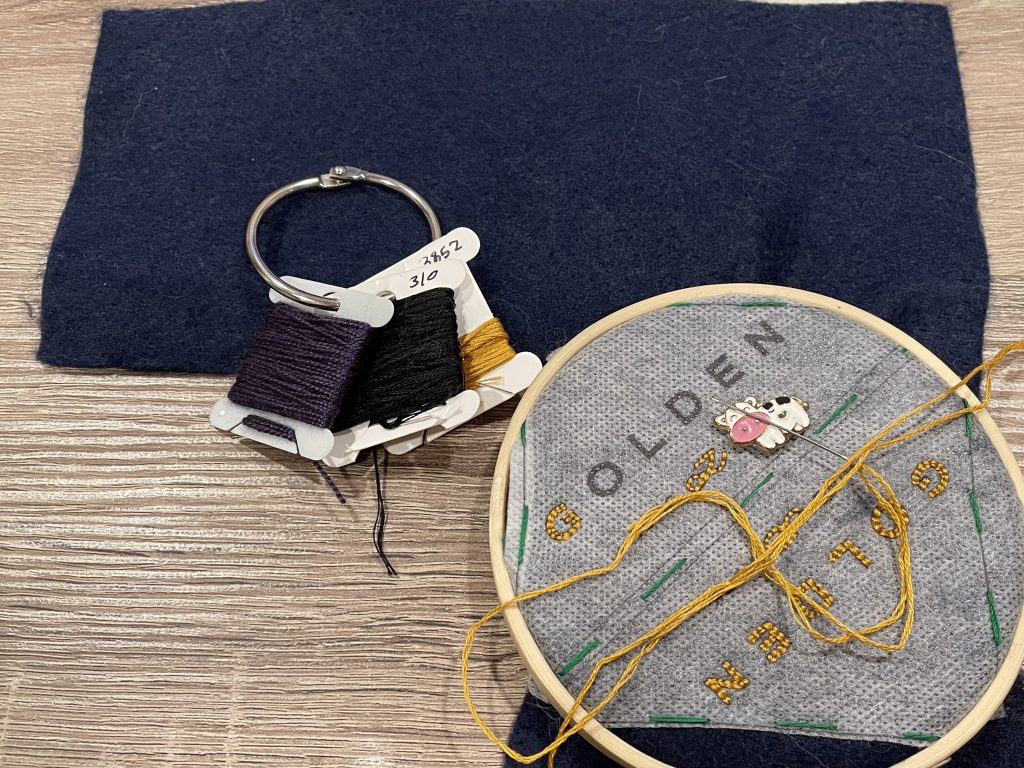
Use three strands. Typically, I cut a length of floss that stretches from my palm to about my elbow. This is a trick I learned from this super cute woman’s helpful video. Then I separate three strands, setting aside the other three to use later.
Thread your needle, and then double-knot the other end. I highly suggest double-knotting for extra security because we want our bookmarks to be used, right? And with use will come pages pressing into the back of the work.
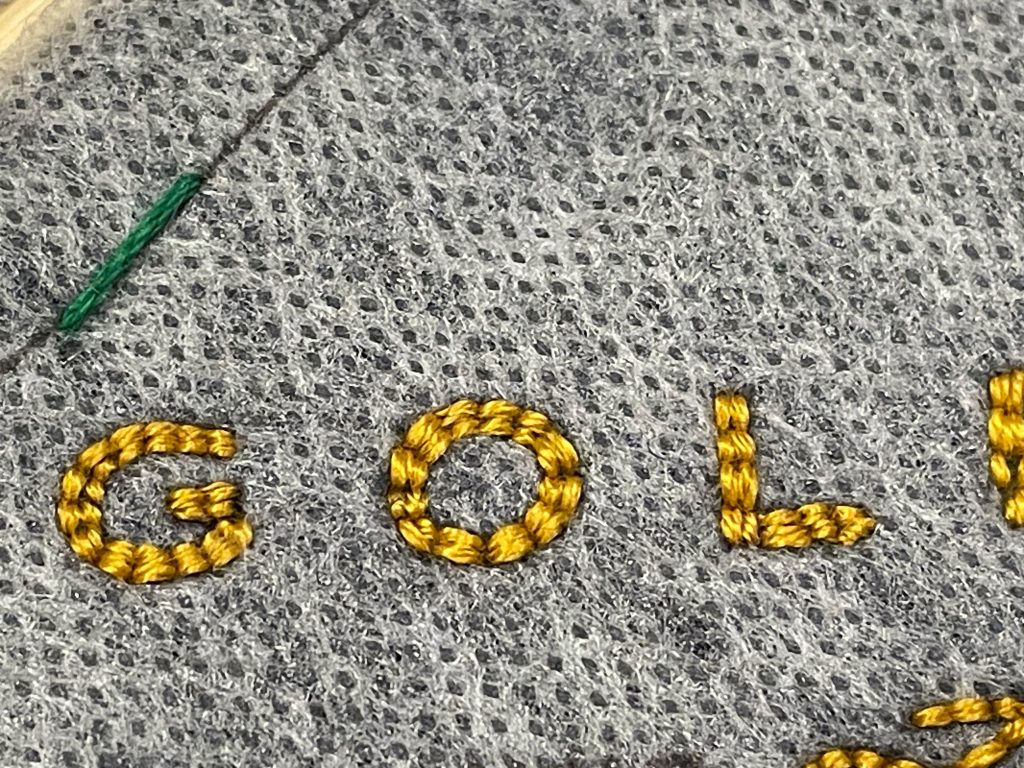
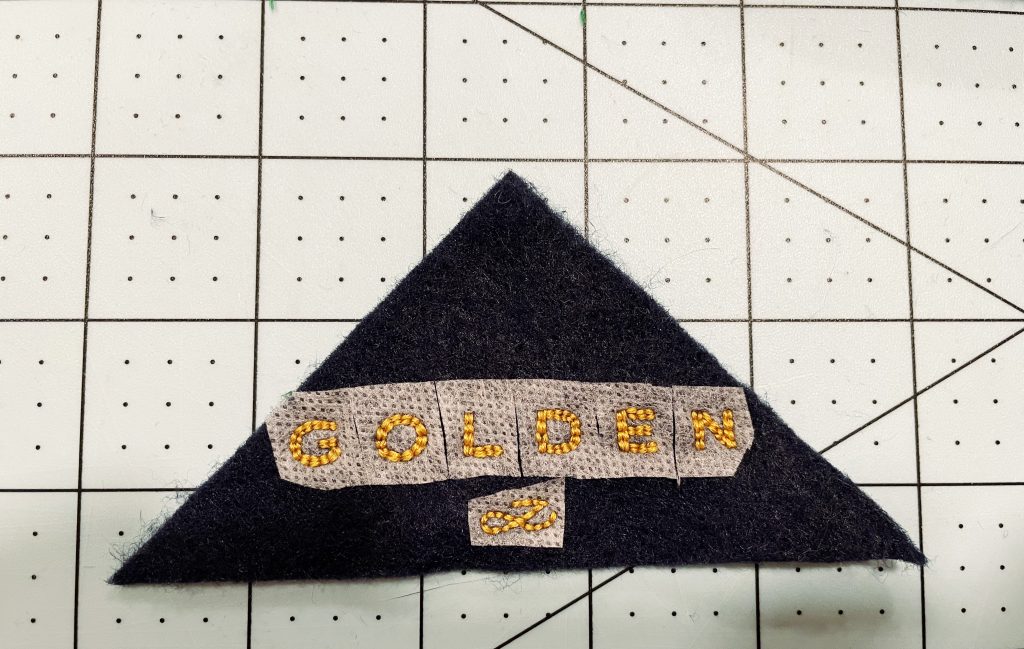
The entirety of this side of the Golden bookmark is done in backstitches.
The trick is to keep your stitches small enough to successfully create curves but not make them super tiny. (I am still working on this lol) For the straighter letters, I try to make them four stitches tall. All of the letters in Golden are created by doing two layers of back stitches next to each other as matched up as possible. You can work either outward in or inward out.
If you can’t perfect this, no worries. I strongly believe that one of the beautiful things about hand embroidery is that it is not perfect. A human made it, with love and effort.
When you finish one letter, tie off the floss by passing it under a few stitches and then knotting it. Not so tightly you pull at and warp your stitches but snugly enough to be secure. Each letter should be separate so you don’t have long stitches on the back that can be snagged when sliding in a book.
JK’s logo is one row of back stitches.
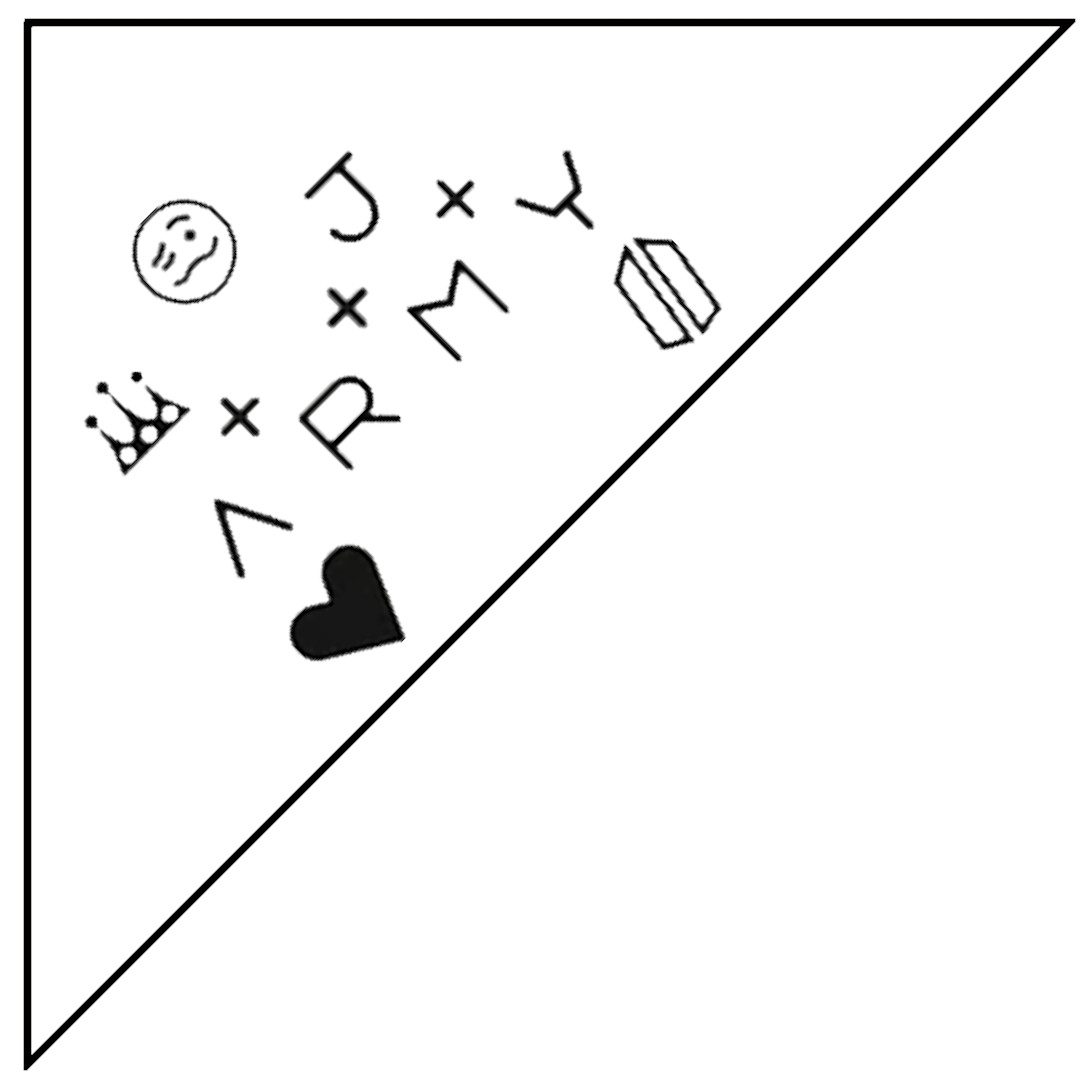
For the tattoo side, use DMC 310 (black) and DMC 32 (a dark purple shade). You might notice that my hearts have a bit of texture on them. That is because I use a dark purple crochet thread I had on hand from a string art project. I cannot find that one in my craft store anymore, but DMC 32 is a very close color match.
Most of the tattoos are done in a single-row backstitch. The straight parts of the A, R, and M are all three stitches long. Because each letter is so thin and close together, I do not finish each one off separately.
The ARMY logo is also three stitches tall, with one stitch on each angle.
Satin stitch the heart.
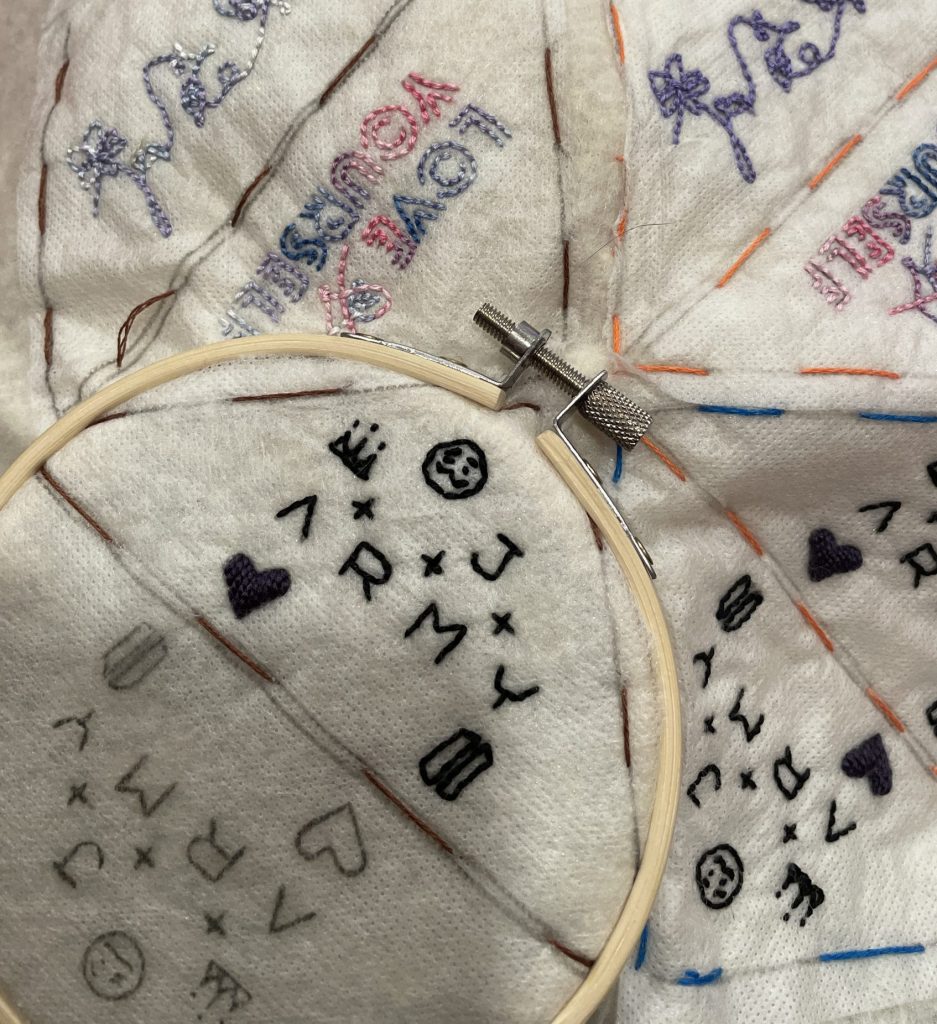
You’ll want to employ the same strategy with the face outline as you did with the curved letters of Golden — small for curves but not too small. I made the smirk with four back stitches, following the curve in the pattern. Each eye is a very small straight stitch. Initially, I attempted a French knot for the circular one, but I didn’t like how it looked.
The eyebrows are kind of like a singular fly stitch. I make a diagonal backstitch and, before pulling the thread through all the way, I bring my needle in the center and just a little bit diagonally up for the right brow and diagonally down for the left brown, bending the line of the stitch, and then stitching it down
With the crown, I like to break it up into triangular sections. Backstitch the legs of a triangle, then a long straight stitch for the spike, and a small straight at the top of the spike so that it looks like a dot. Then do the next triangle section working downward: top of spike, spike, triangle legs. Then up one leg of the next triangle, spike, top, and down the last leg. I then finish off the crown by doing three backstitches at the bottom connecting the triangles.
Cleaning up & Putting Together
The next several steps are for if you followed my route of making the bookmarks. If you cut out bookmarks before embroidering and didn’t use a wash-away transfer method, you can skip ahead.

Once you have finished embroidering any or both sides of your Golden bookmark, cut it from the rest of your felt. I use a straight edge and a rotary blade on a cutting mat.
After I’ve cut my sides out, I like to trim away large portions of blank stick n’ stitch so that the cleaning process will be easier. The previous batch I bought all came away easily, but the newer pack I got really, really sticks to the felt and I feel uncomfortable cutting it out and stretching the felt’s fibers. So I would say trimming is up to your discretion.
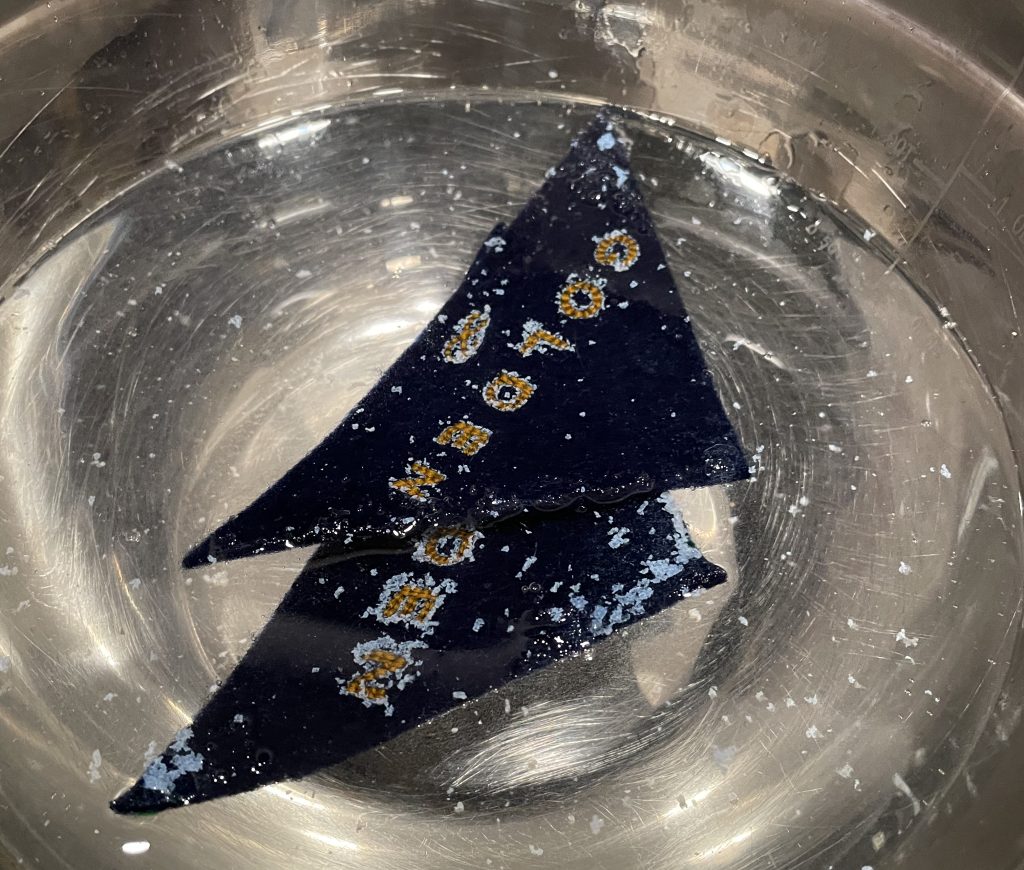
Then run the bookmark pieces under warm water, scrubbing lightly with your fingers. I find cold water doesn’t work as well in breaking the bonds of the glue. After this, I place my pieces in a bowl of warm water and use the small end of a metal chopstick to be sure all the adhesive has washed away from the stitches and to also reshape any errant ones.
You can squeeze them in your hand or press them into a clean towel and then let them dry completely before stitching them together.
To begin stitching your Golden bookmark together, place your two sides together so that the backings face each other and their edges line up.
We’re going to use a blanket stitch on the edges of our triangles to sew them together. Trying to explain the stitch in words may not be very helpful. So, I am also going to link the video that I watched to wrap my head around it.
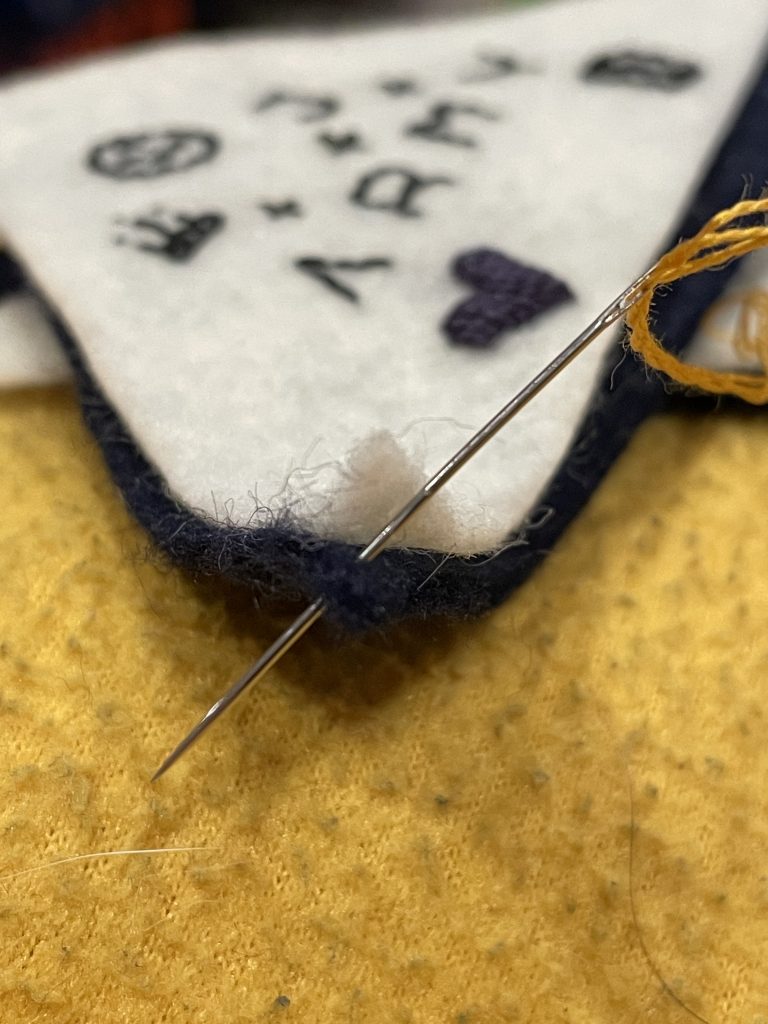
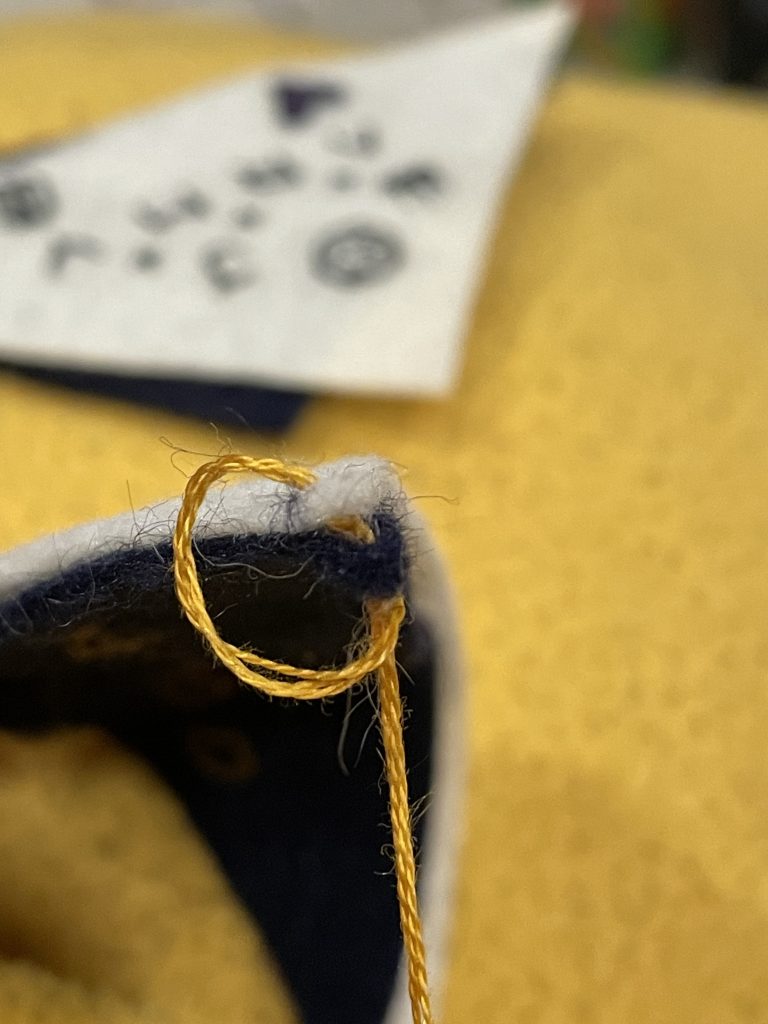
To start, thread your needle with three strands of DMC 3852 and knot the loose end. Then, push your needle through one side of the bookmark from the center, which will hide your knot in the middle.
Next, push your needle through both sides, using the same hole as your first stitch.
Before pulling the stitch through, push your needle through the loop you’ve created, then draw tight.
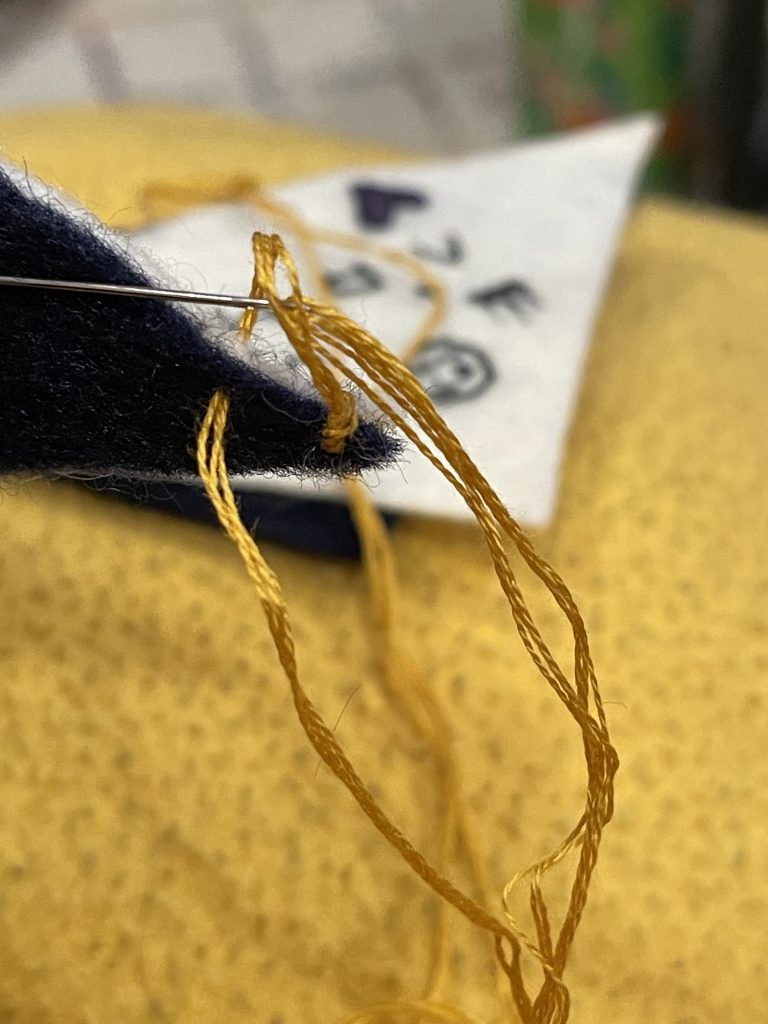
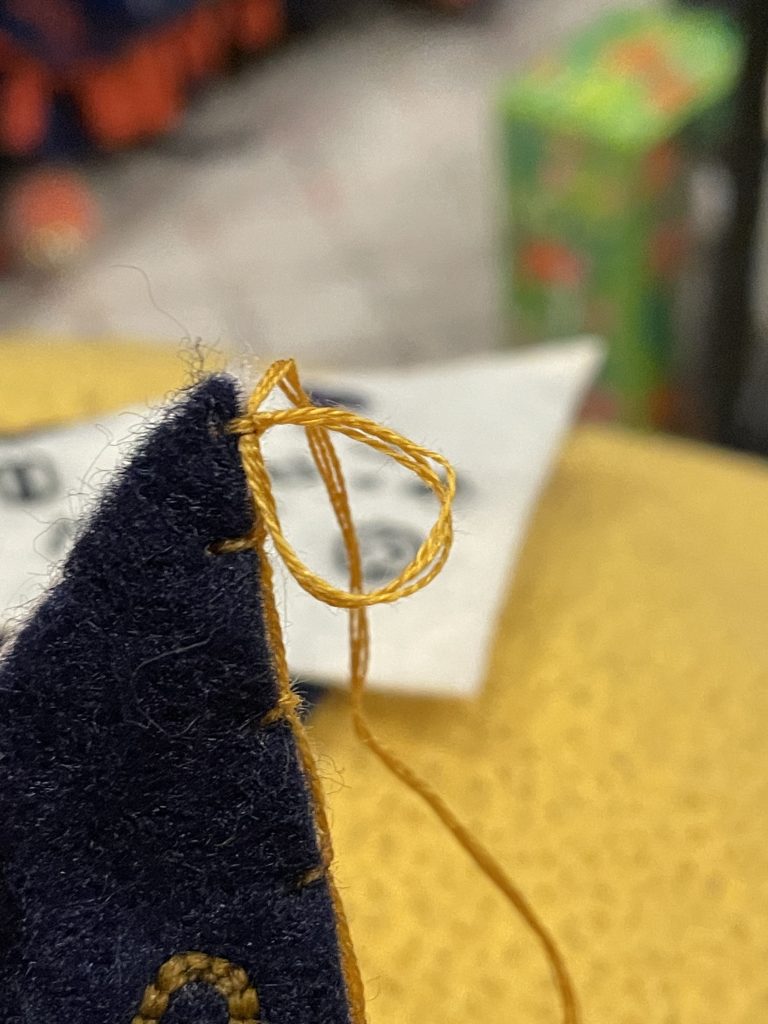
Move a stitch length down the edge, push your needle through both sides, and then bring the needle back through the loop before drawing tight.
The key to a clean blanket stitch is always stitching from the same side as you go. Try to keep your stitch lengths as even as possible.
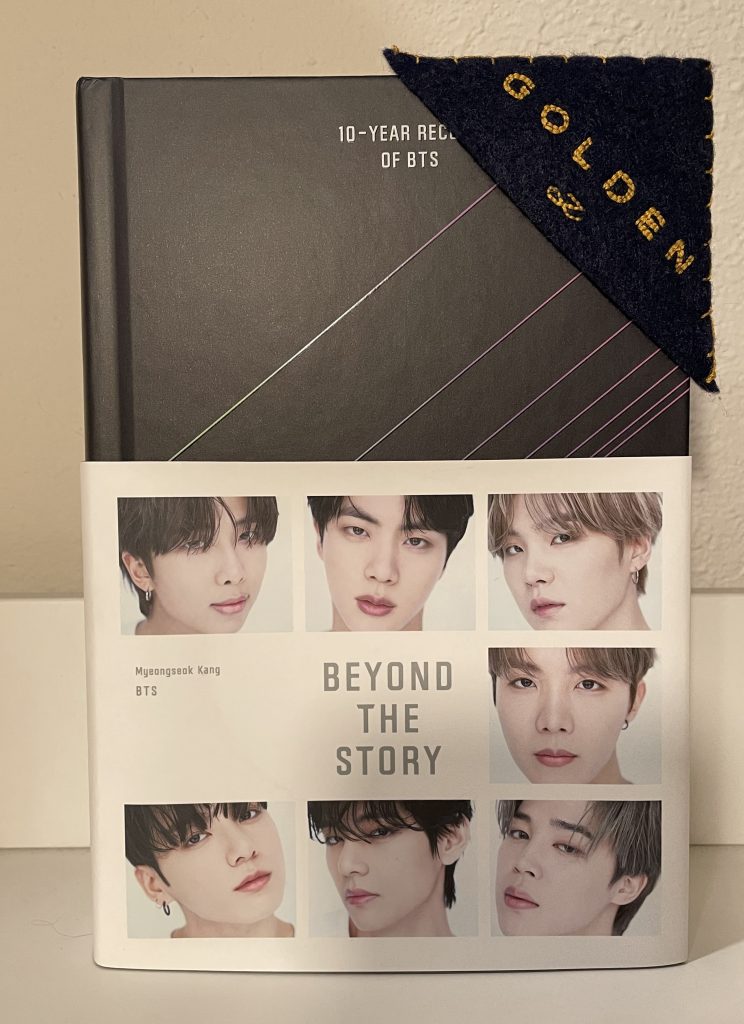
Once you’ve reached the end, make a knot over your last stitch and trim away the excess.
And that’s it! You’ve finished your very own Golden bookmark.

Please let me know if any part of this was unclear or if you have any questions about the process. I’m happy to help and share tips.
And I’d love to see your finished projects. Feel free to tag me on Instagram or X to share! And let me know which bookmark pattern you’d like to see next.