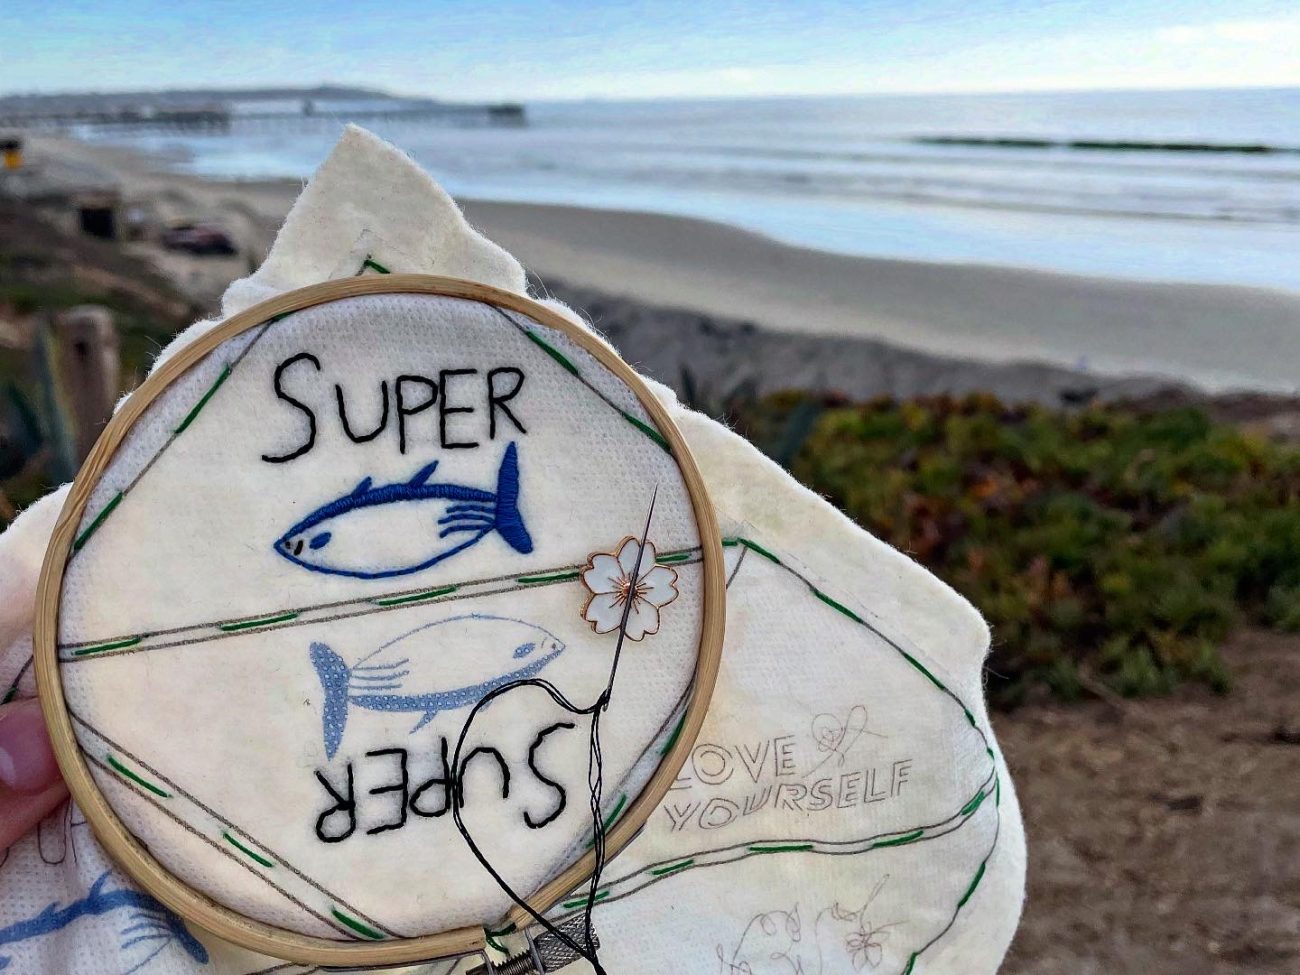
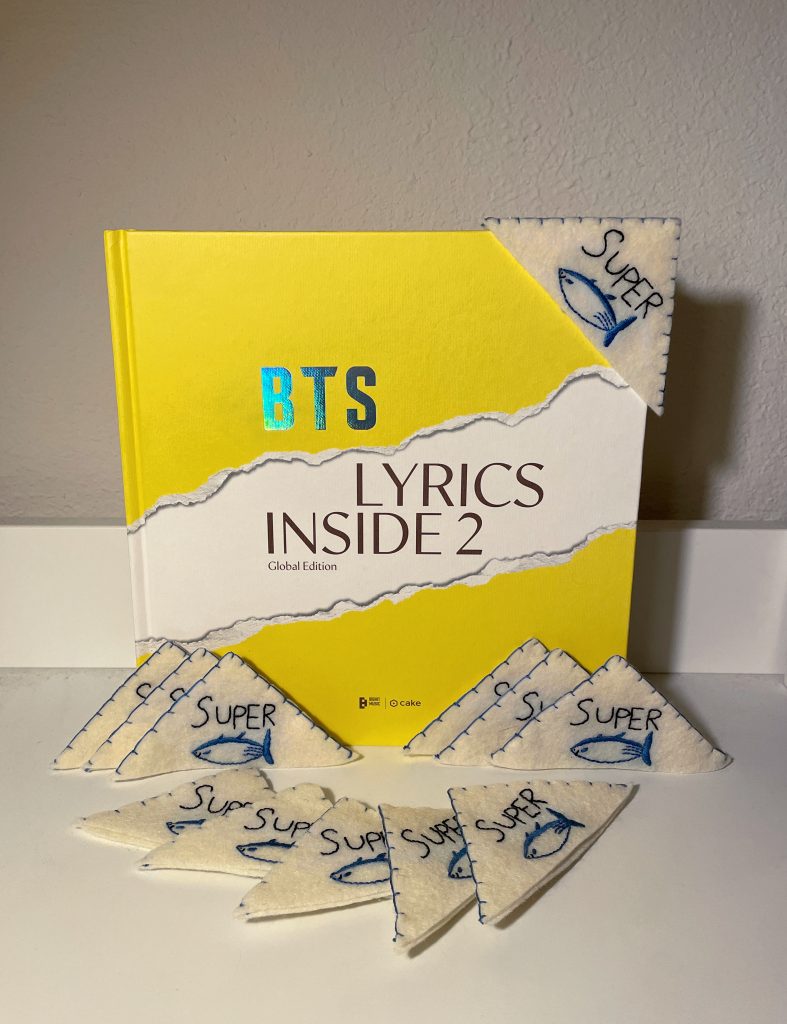
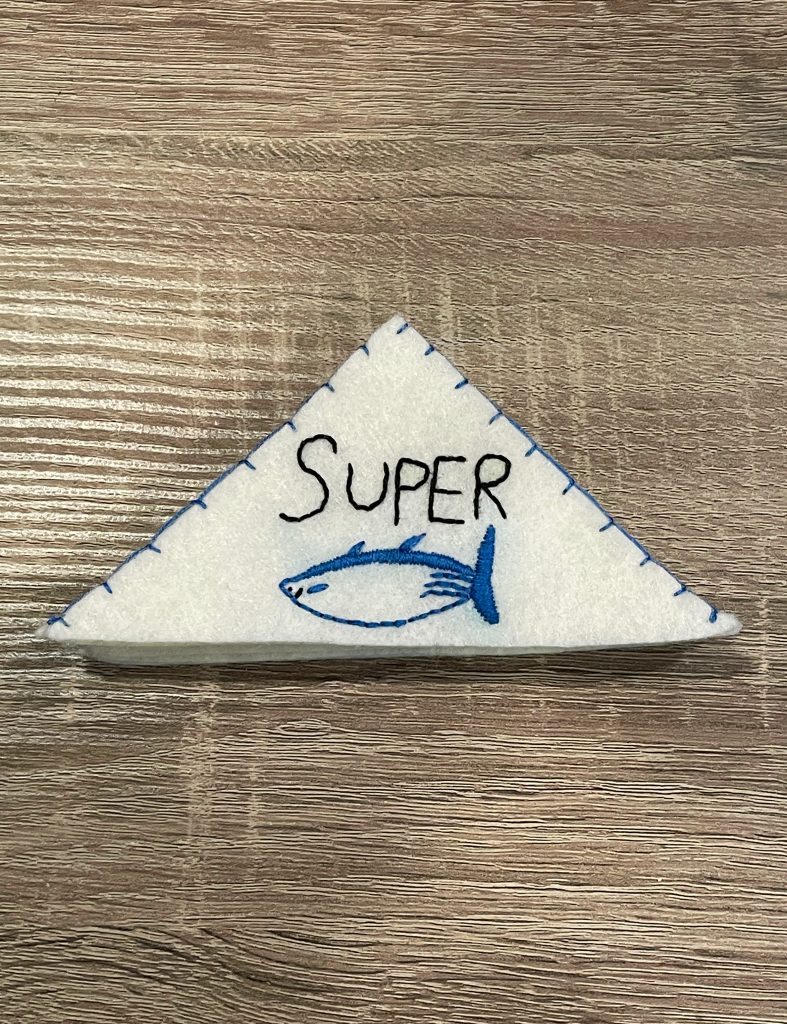
The Run Seokjin Tour has finally started and I’ve been working super hard on my freebies. I have loved every song off of Echo and Happy but it’s hard not to immediately think of Super Tuna when I think of Jin.
In my baby ARMY days I was a lot less dedicated to making sure I was abreast of all BTS news. So I was completely caught by surprise the first time Super Tuna played on my BTS radio playlist . I will never forget that feeling of awe, and a little shock. And that is a major reason why I decided to add a Super Tuna bookmark to my freebie repertoire.
Since we’re all going to be on Team Kim Seokjin for the next few months, as Jin embarks on his world tour, I think it’s a great time to share this pattern with you all.
If you’re new here, or to embroidery, please check out my introductory post about what you’ll need to get started. And if you want to know more about how I decided to start embroidering bookmarks, feel free to read about it here.
Let’s get started!
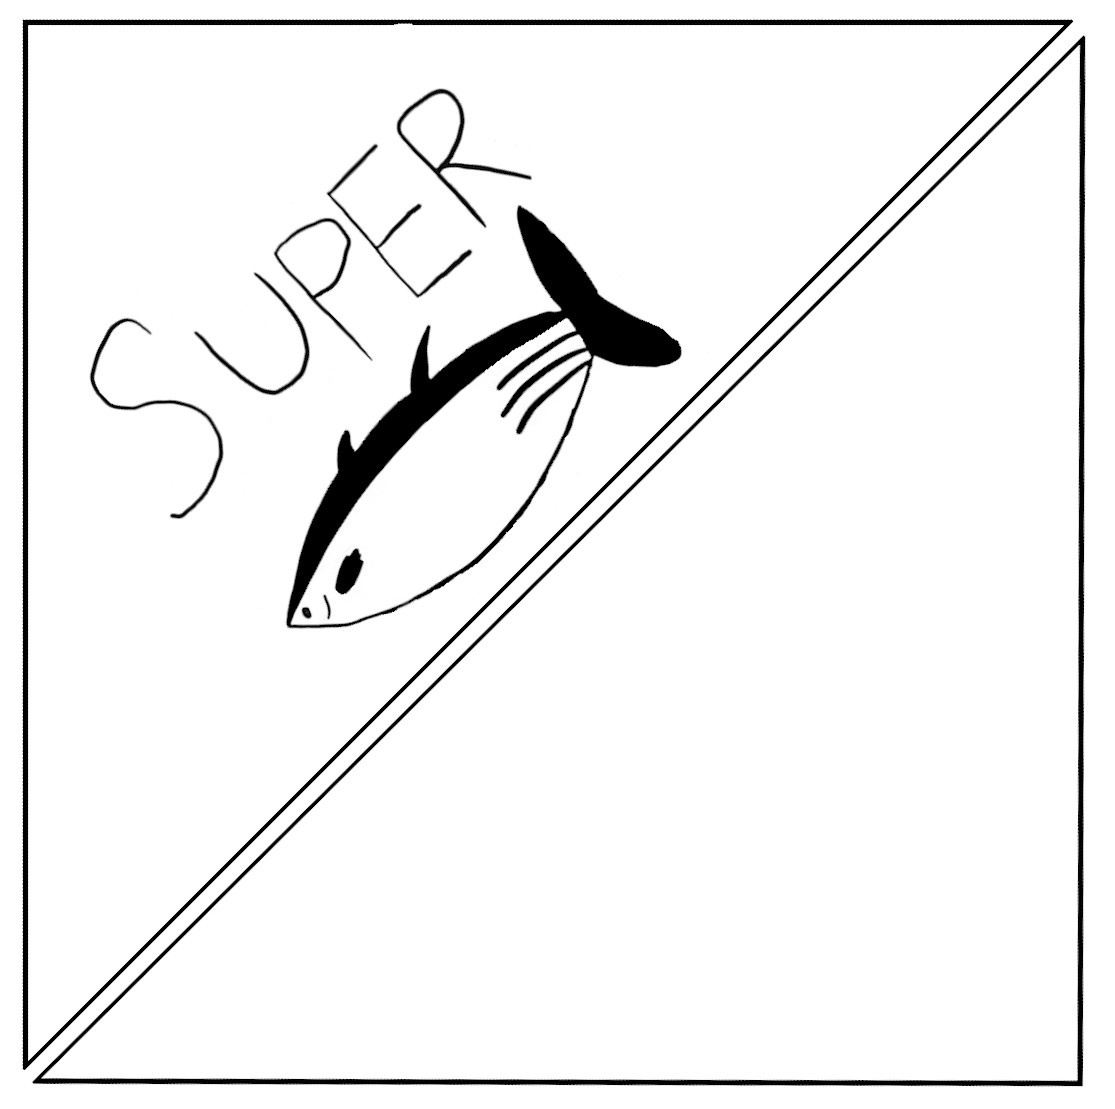
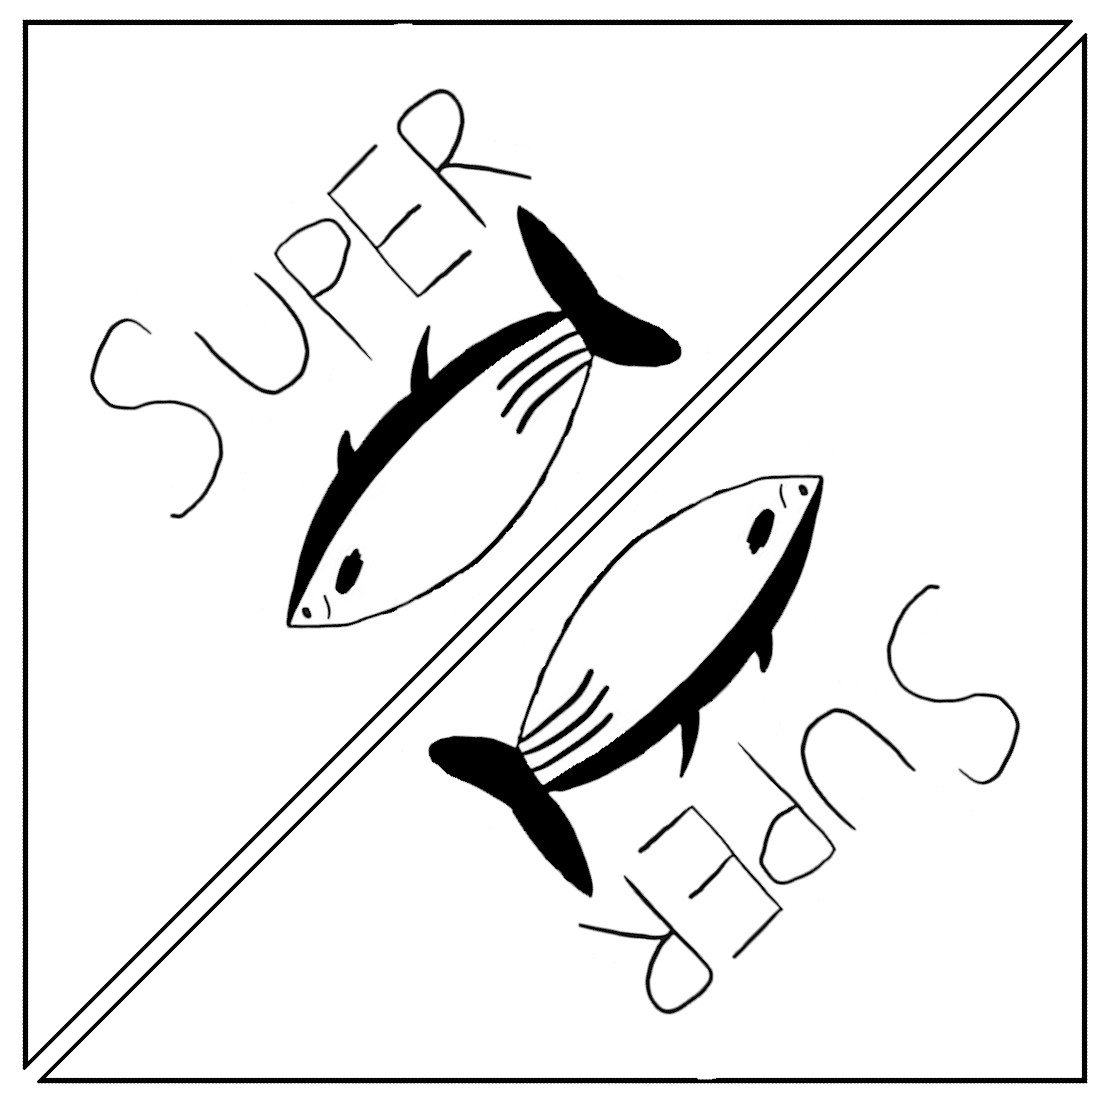
Downloadable Pattern & Guide
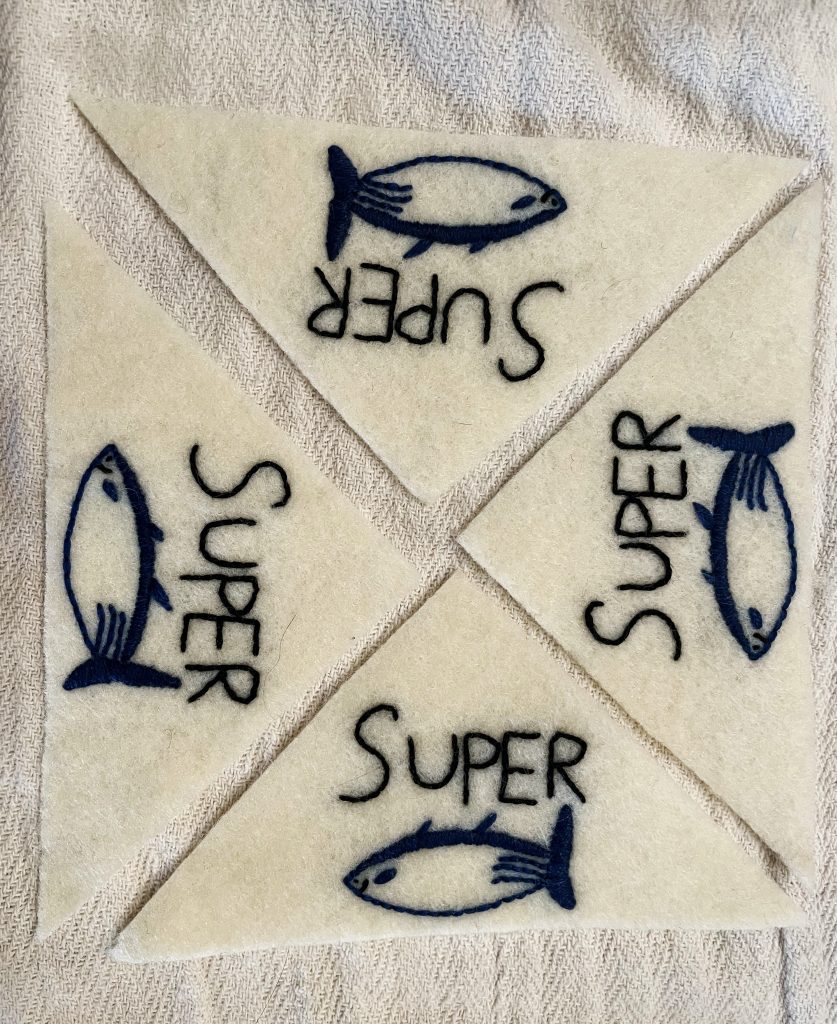
The pattern for this Super Tuna bookmark is an edited and sized version of a popular redrawing of Jin’s tuna art that is all over the internet. (If you know who the original artists is, please let me know!) I really liked the idea of using the tuna for this bookmark because it looked simple enough to imitate with simple stitches and could be done on a white background.
In this section, you can find the files to help you make your own Super Tuna bookmark. First, a PDF color and stitch guide. Then, several file variations of the pattern so you can use it however you want. I included both a singular pattern and double one in case you want to make multiple.
XCF files are specifically for Gimp, where you can edit how you please. Jpegs and PDFs are used anywhere.
Super Tuna bookmark step-by-step
If you’ve been following along as I’ve released guides you’ll know that I’ve said the other two designs were super beginner friendly. While I don’t think this Super Tuna bookmark is ridiculously difficult, it does require some experience with satin stitching. The back fin and top of the fish are small areas and satin stitching them cleanly can be very frustrating.
Below, I’ll walk through my process.
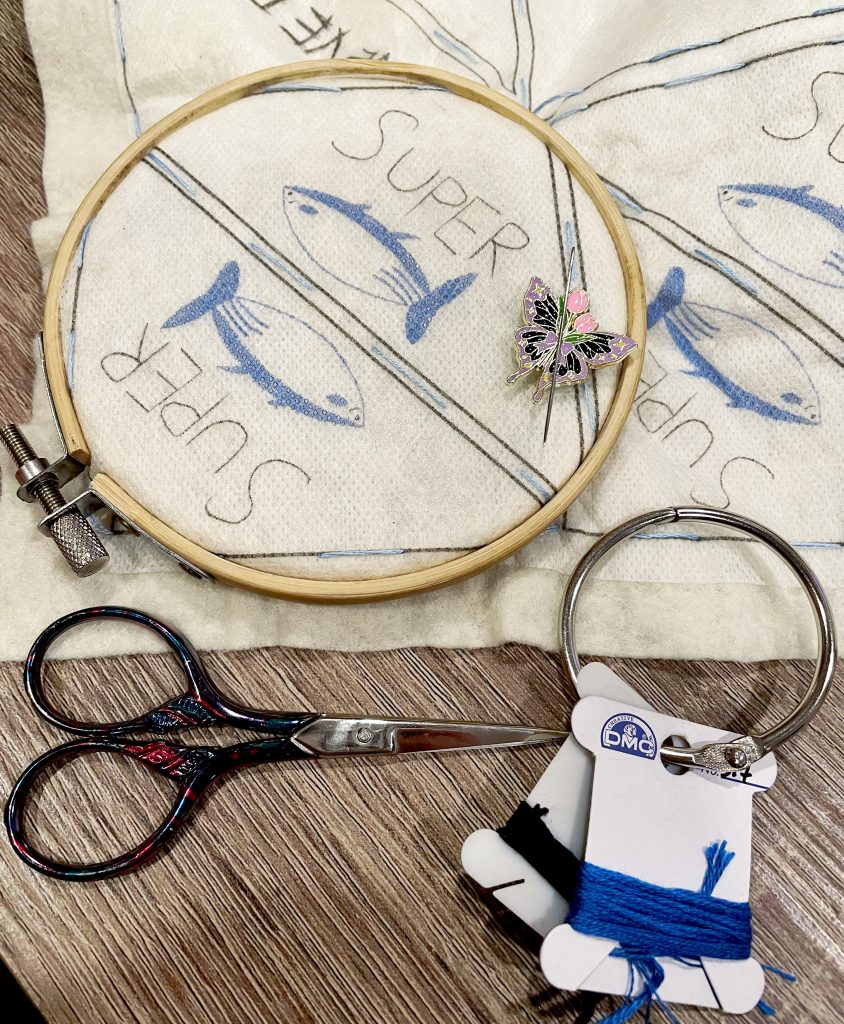
Materials
- One of the patterns provided
- DMC embroidery floss in DMC 310 and 517. To color match to another brand, you can use this website. Or you can use this website to convert the thread color to RGB values to find the closest match in another brand. (I also use DMC C798 for the edges but it’s not necessary)
- A transfer method. I use wash-away stick ‘n stitch for all my bookmark projects.
- If you go this route you will need a printer and scissors. I like to sew my pattern on for extra sturdiness. You will need extra floss if you would like to go that route as well.
- To wash away the pattern, you will also need warm water. (I also use a bowl and a metal chopstick)
- Medium-sized needles (5, 6 or 7).
- Embroidery scissors (or any small scissors) & fabric scissors
- An, at least, 4-inch hoop, if you want to use a hoop.
- At least a 4-inch x 4-inch piece of felt.
For all my white bookmarks I used an off-(or antique/aged) white felt. I like it more than a normal white because it feel less like I’m going to ruin the color every time I touch it. 😅 You can buy white or off-white fabric in paper-sized sheets or by the yard from most large craft stores.
If you’d like a more detailed step-by-step of my bookmark prep process you can read my Golden bookmark tutorial at ‘getting started.’
Getting Stitching
I always like to start off the Super Tuna bookmark by stitching the letters. Once you’re all set up to start embroidering, cut off a manageable length of DMC 310 and then divide it in half. Thread your needle with three strands of floss and then double-knot the other end. Security of your first stitch is crucial, so I highly suggest double-knotting.


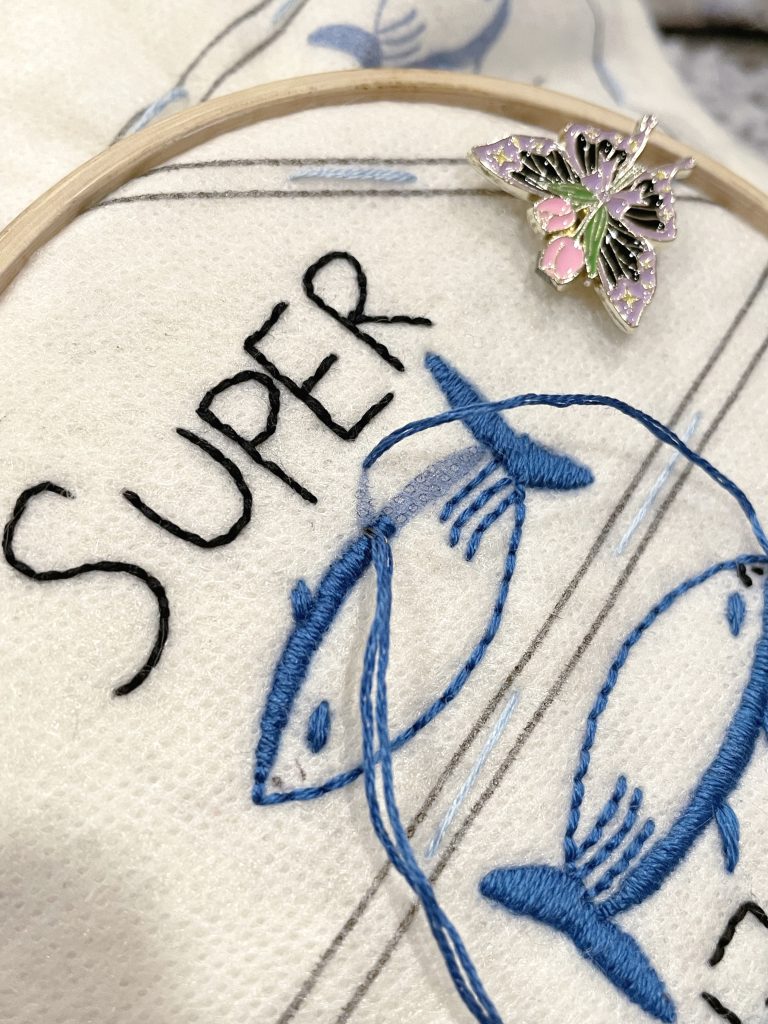
The ‘super’ is done in a backstitch. You’ll want to keep your stitches on the smaller side to be able to make accurate curves. For a size reference, my ‘e’ is four stitches tall.
Part of the charm of Jin’s original drawing was that it was individual and rough. So don’t worry too much if your word doesn’t look perfect!
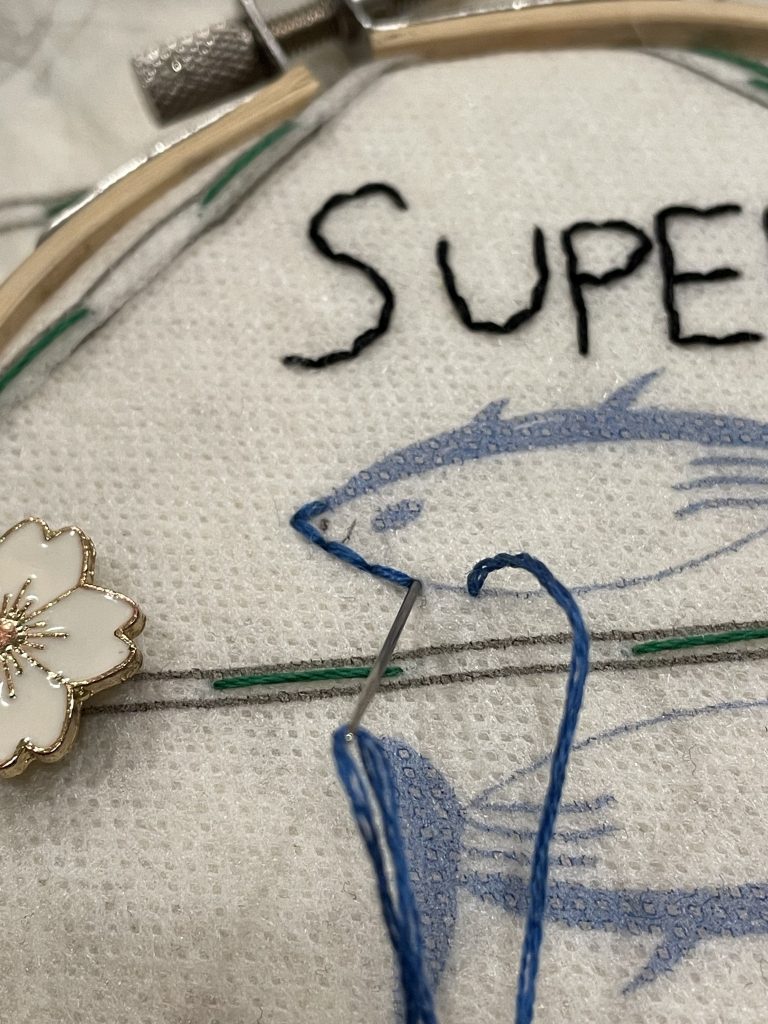
Next, I like to do the belly of the tuna into the body details. With three strands of DMC 517 back stitch from the the nose of the tuna to the tail, following the lower curve.
Then back stitch each of the three lines on it’s body. I do about four stitches per line. But, I’m not very consistent!
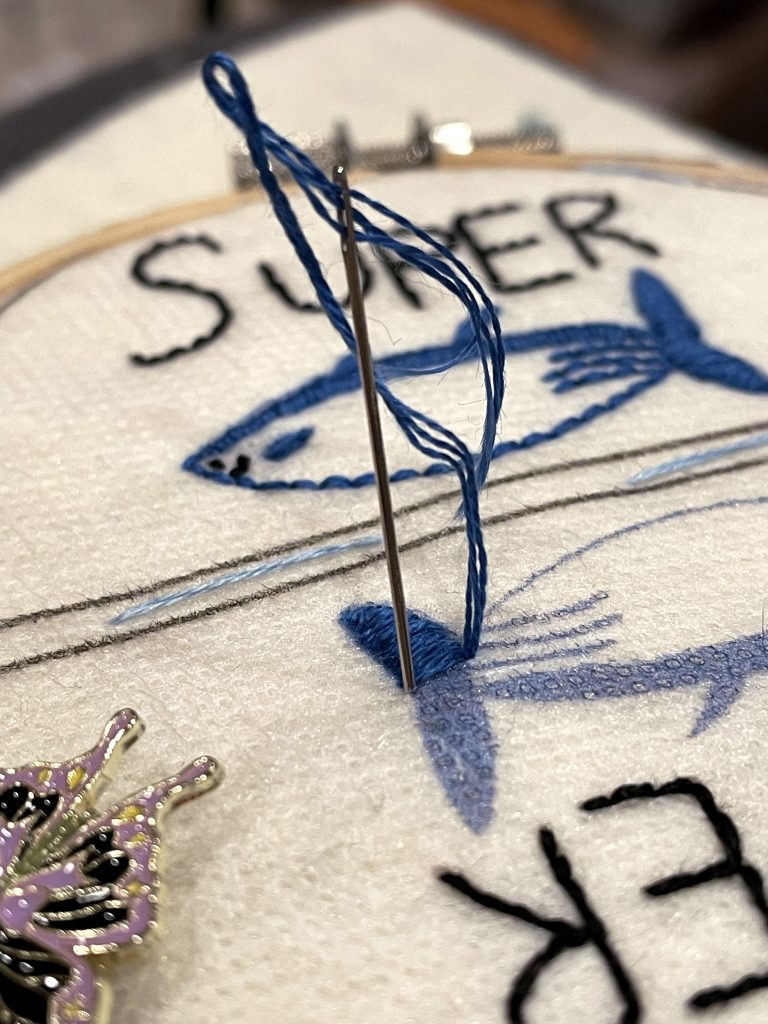
Horizontally satin stitch the fish’s tail next. I like to start near the center of the tail and work down, then return the center and work up. If you find the tip of the fin too difficult to satin stitch, you can use a small straight stitch, tucked under the other stitches, to make a point.
Moving on from the tail, vertically satin stitch the top of the tuna. I embroider just past a top fin before pausing to straight stitch it. This is so that I have a base to connect the fin to. For the small fin, use short stitches; longer straight stitches for the larger fin.
Whichever side you start from, when you get to around to where the pectoral (side) fin is, you can take a detour to use straight stitches to form it.
Finish it off with DMC 310 again in a very small straight stitch to make the eye (I’ve attempted a French knot here before and didn’t like it but feel free to try it) and two back stitches to make the smile. I use 3 strands but 2 strands would work well, too.
Cleaning Up & Assembling
If you cut out bookmarks before embroidering, didn’t use a wash-away transfer method, or you’ve followed one of my posts before, you can skip ahead to assembly. The next several steps follow my bookmark process post-embroidery.
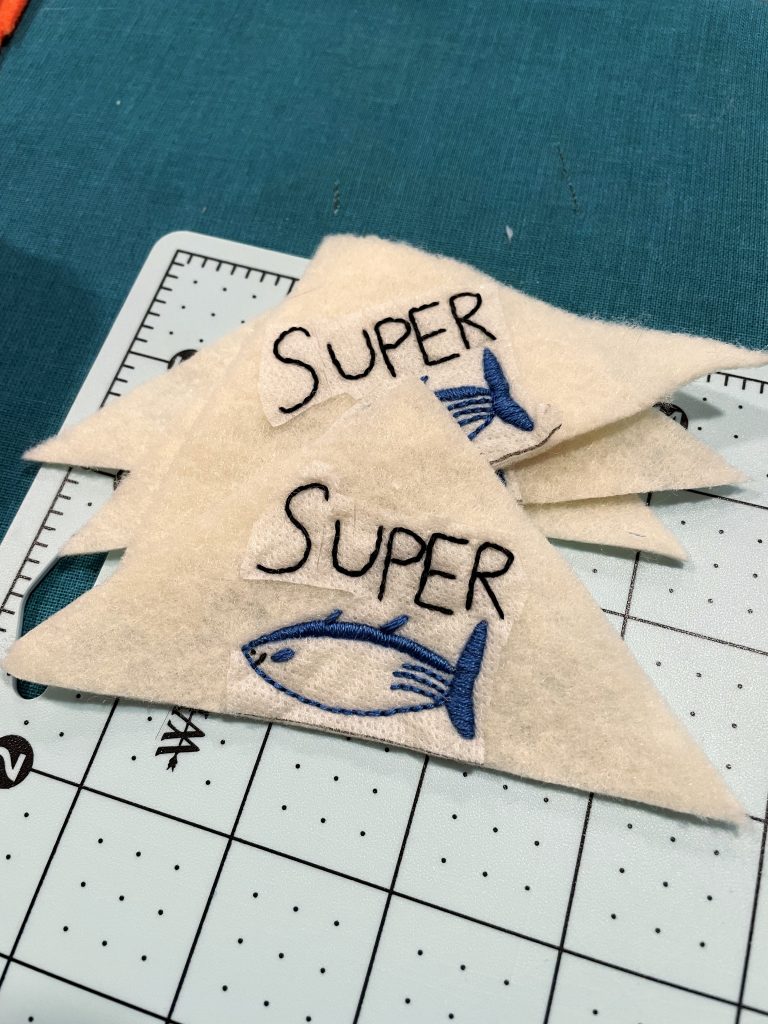
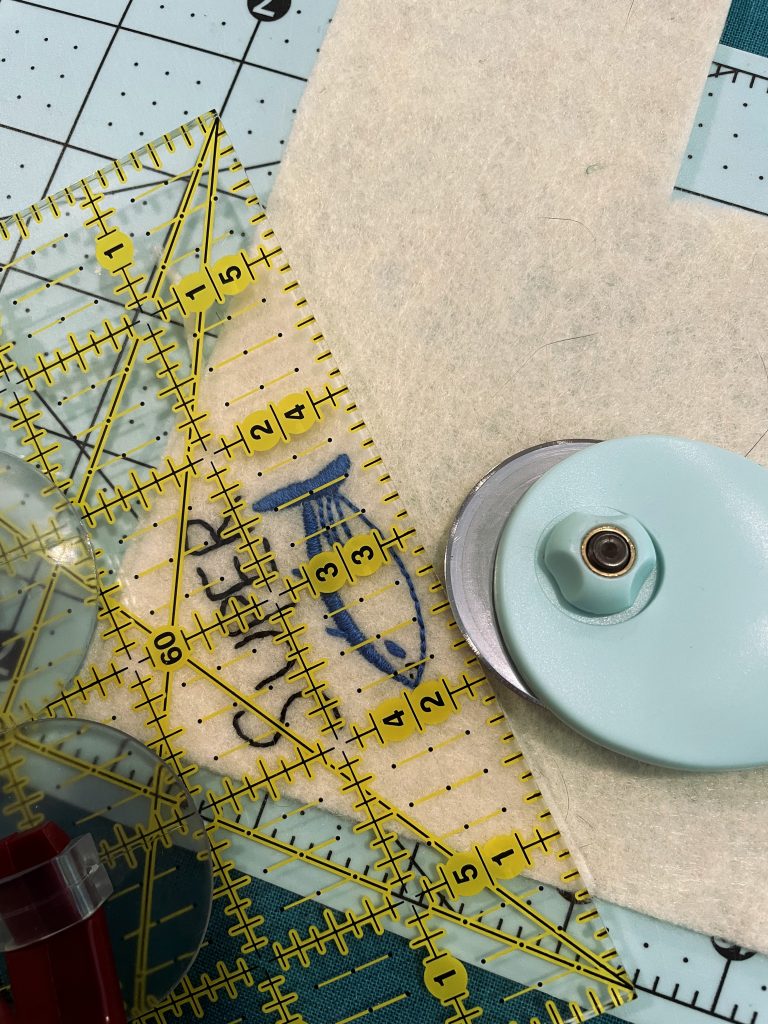
Cut your finished Super Tuna bookmark from the rest of your felt. I use a straight edge and a rotary blade on a cutting mat.
After cutting the bookmark, I like to trim away large portions of blank stick n’ stitch so that the cleaning process will be easier. It isn’t always easy to remove without damaging the felt, especially with softer felts. So, pre-trimming can sometimes be ill advised and is up to your discretion.
Next, run the bookmark under warm water, scrubbing lightly with your fingers. I find cold water doesn’t work as well.
After, I place my bookmark in a bowl of warm water and use the small end of a metal chopstick to be sure all the adhesive has washed away from the stitches. (Particularly in the small in-between spaces.) And to also reshape any errant ones.

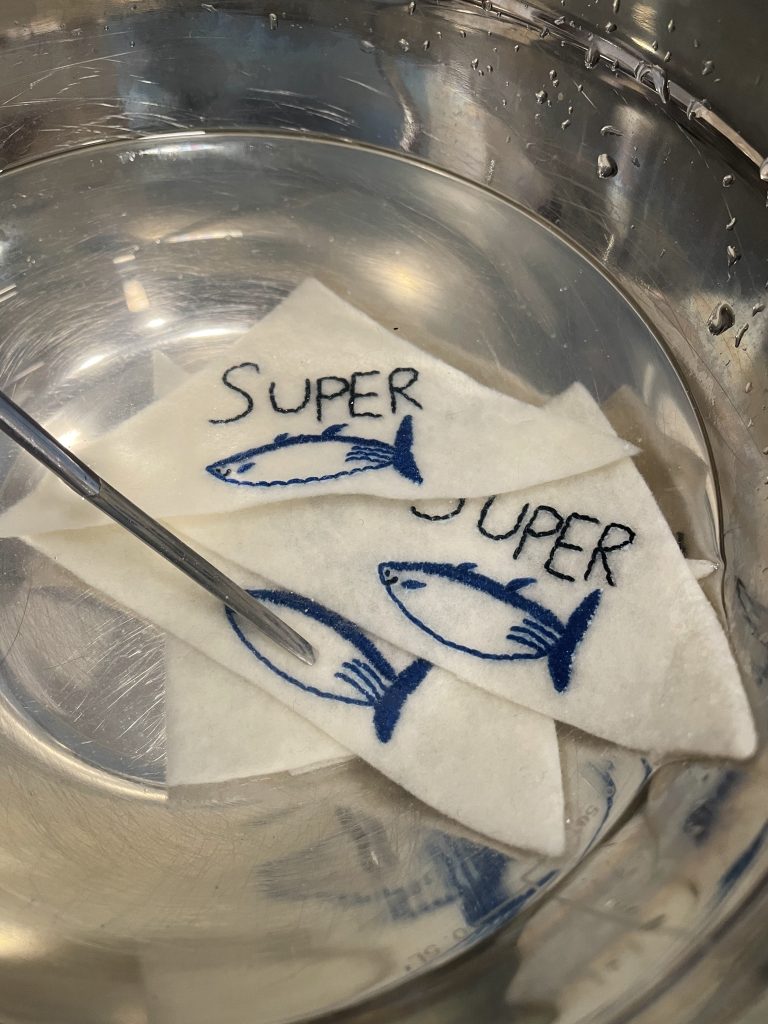
You can squeeze it in your hand or press them into a clean towel. Then lay it flat and let it dry completely.
For the backings, I like to use each bookmark front individually to cut out a back so that it will be the exact same dimensions. Place a front on the same color felt and use it as a guide to cut out the back.
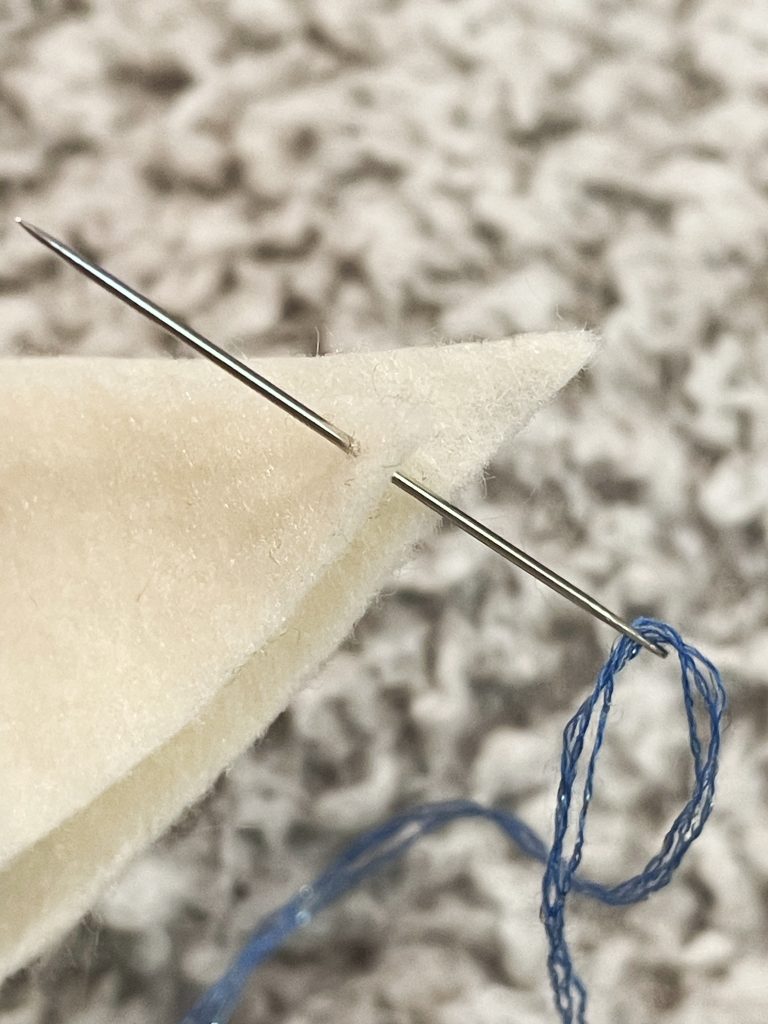
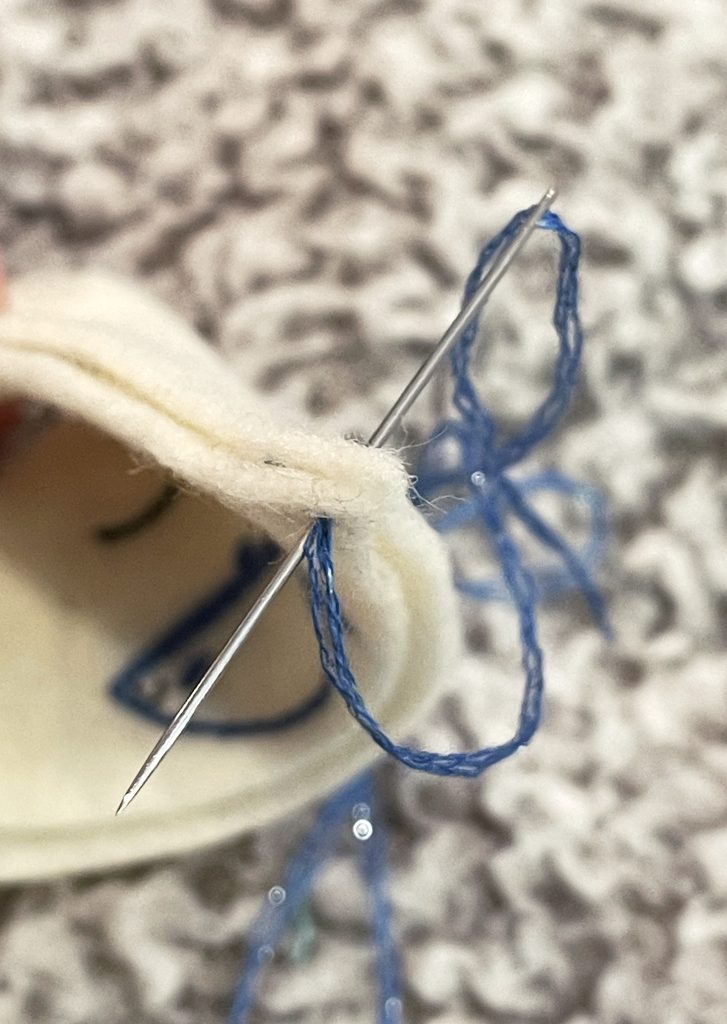
Now, you can begin assembling your Super Tuna bookmark! Place your two sides together so that the backing faces the inside and their edges line up.
We’re going to use a blanket stitch on the edges of our triangles to sew them together. I am going to link a video that may work better for visual learners.
Thread your needle with three strands of DMC 517 or, if you’re feeling sparkly, you can use DMC C798. It’s a similar color with a strands of glitter thread mixed in. Knot the lose end.
Then, push your needle through one side of the bookmark from the center. This will hide your knot in the middle.
Next, push your needle through both sides, using the same hole as your first stitch.
Before pulling the stitch through, push your needle through the loop you’ve created, then draw tight.
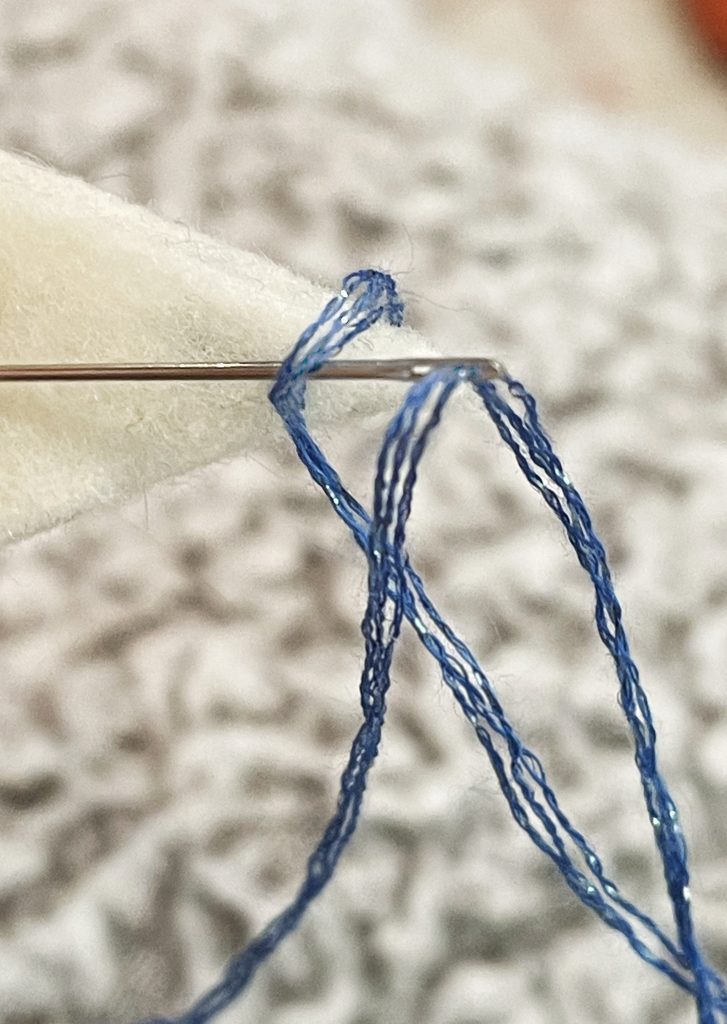
Move a stitch length down the edge, push your needle through both sides, and then bring the needle back through the loop before drawing tight.
The key to a clean blanket stitch is always stitching from the same side as you go. I always bring my stitches toward the front of the bookmark from behind.
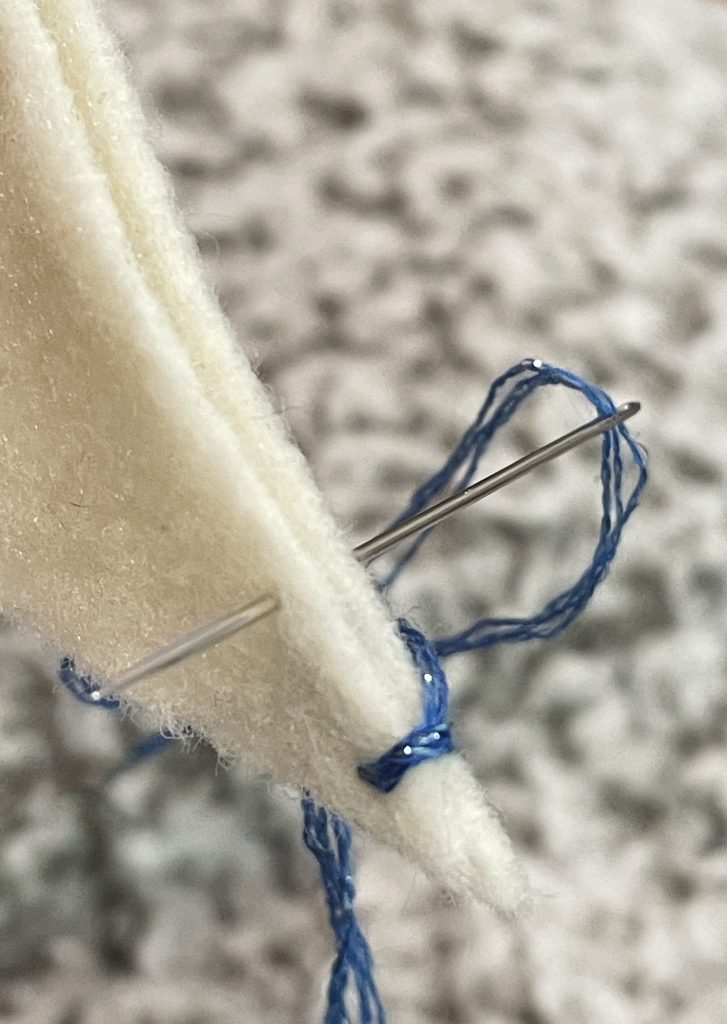
Once you’ve reached the end, make a knot over your last stitch and trim away the excess.
And your very own Super Tuna bookmark is done!
Please feel free to reach out with any questions; I’m always happy to help! If you want to share your completed bookmark, I’d be super excited for you to tag me on Instagram or X.
If you’re going to see Jin in Newark, I’m going to be in the VIP line on D2 in bright pink cowboy hat and boots. I’m going to have lots of bookmarks, phone charms and bracelets, so be sure to say hi! I can’t wait!
And if you have any requests for the next pattern I should share, let me know.
This and you are so lovely! Thank you for sharing 💜🫶✨️
Thank you so much! 💜