It’s finally concert time again (at least for half of the world)! I’m so excited to see BTS live for the first time ever. Hope on the Stage was my first-ever BTS/BTS-adjacent concert and my first real experience with how generous ARMYs are. You guys are crazy in the best way and I came home with so many memories, a new best friend, and so, so many freebies.
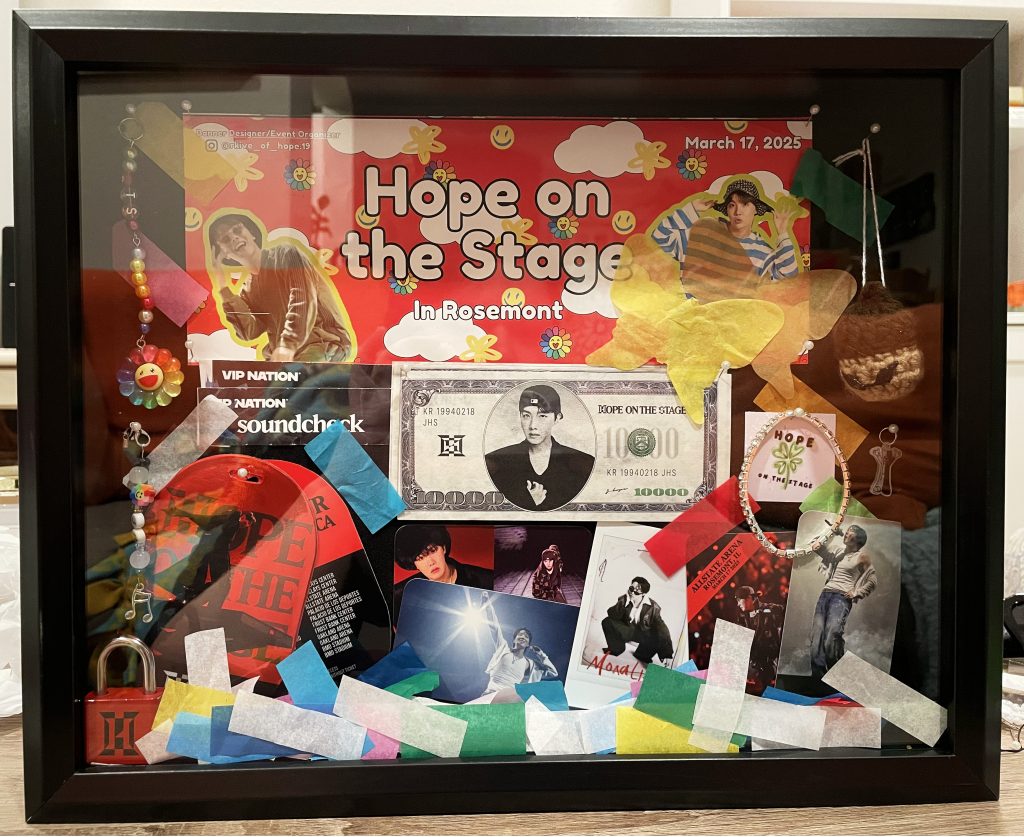
So many, in fact, that I had no idea what to do with them all. The only thing I did know was that I wanted to preserve the memories of HOTS as quickly and as best I could. I’d seen a lot of ideas online about how other ARMYs and concert goers preserved their concert merch and freebies and a shadow box seemed like the best one.
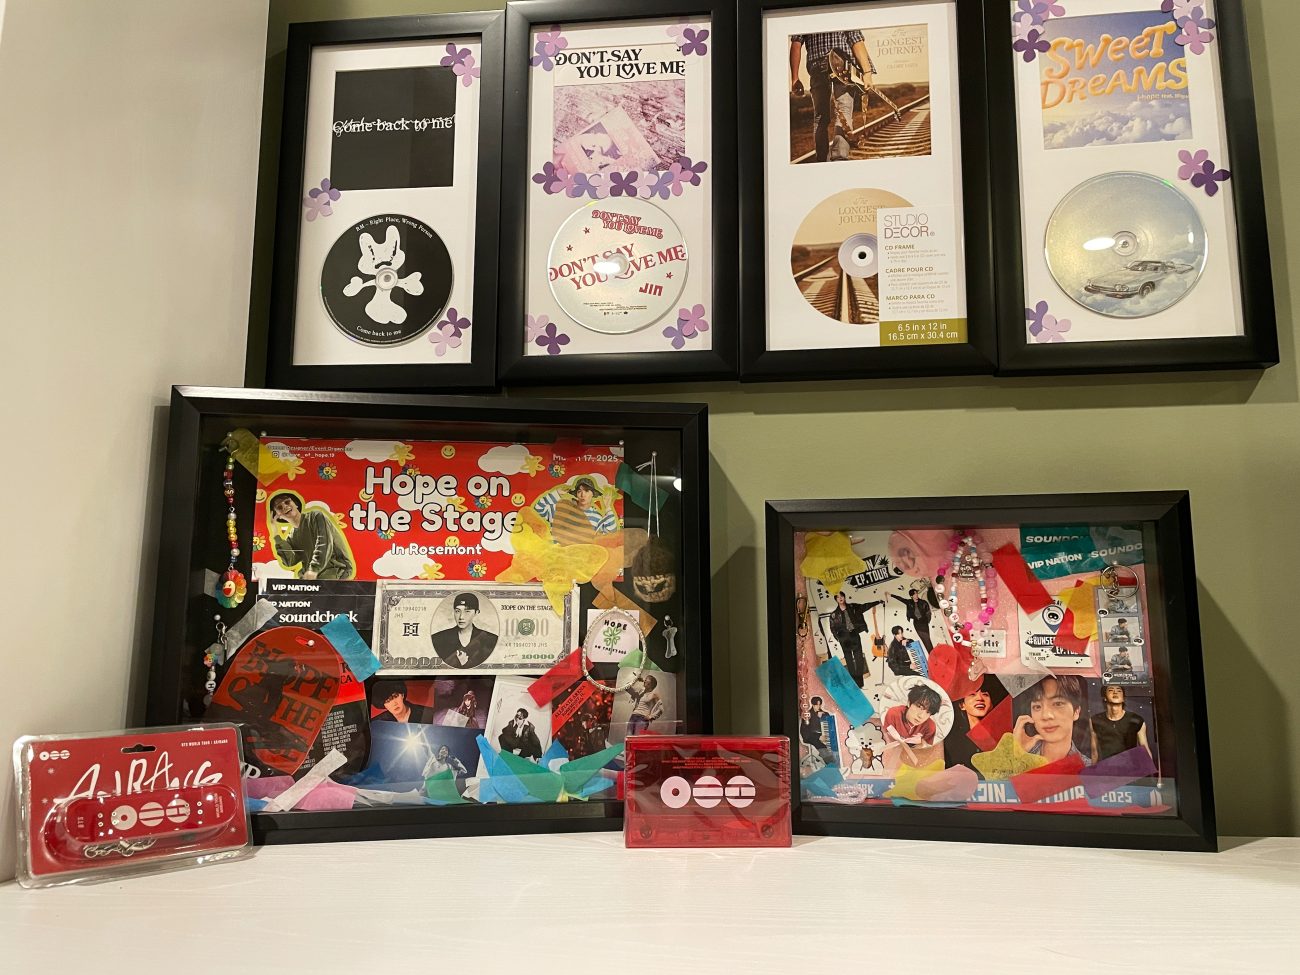
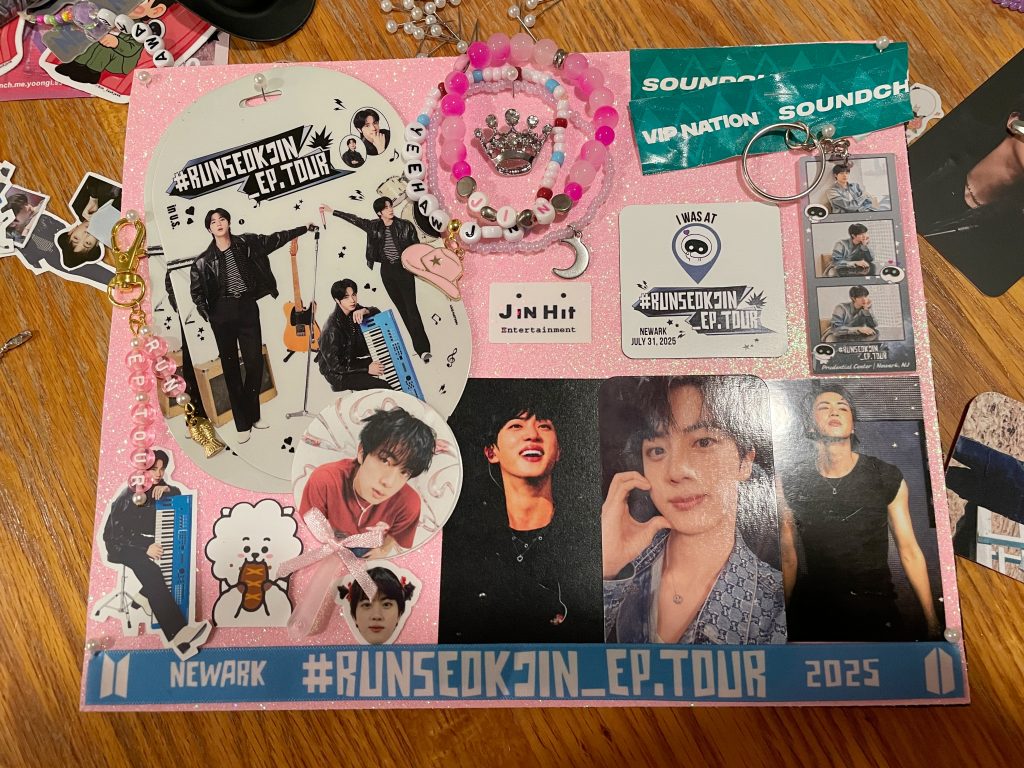
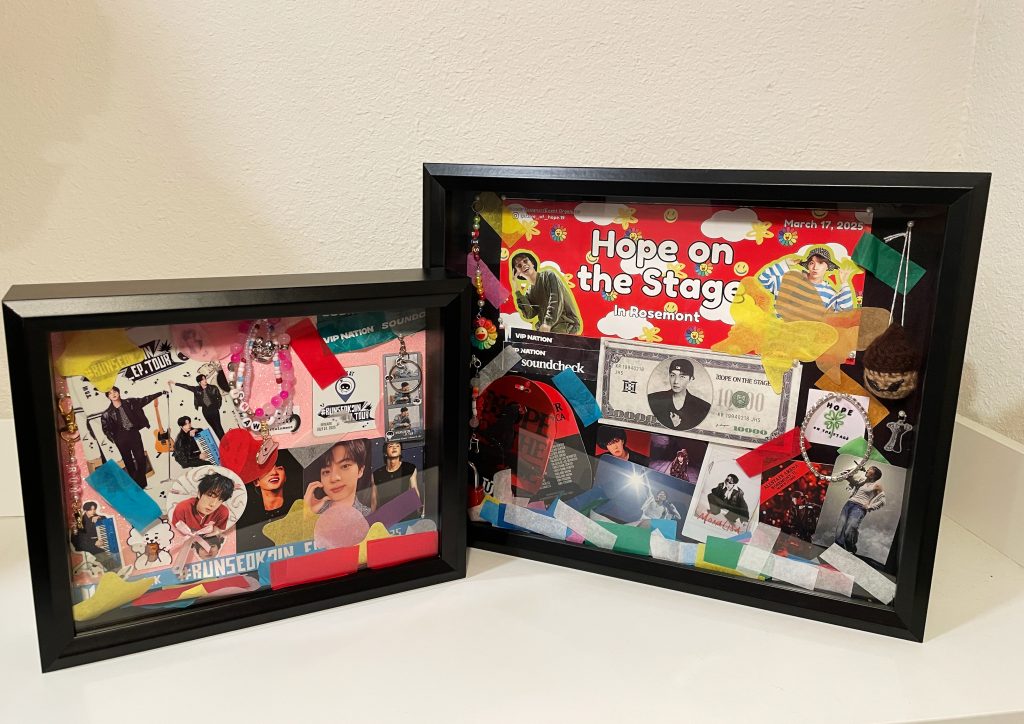
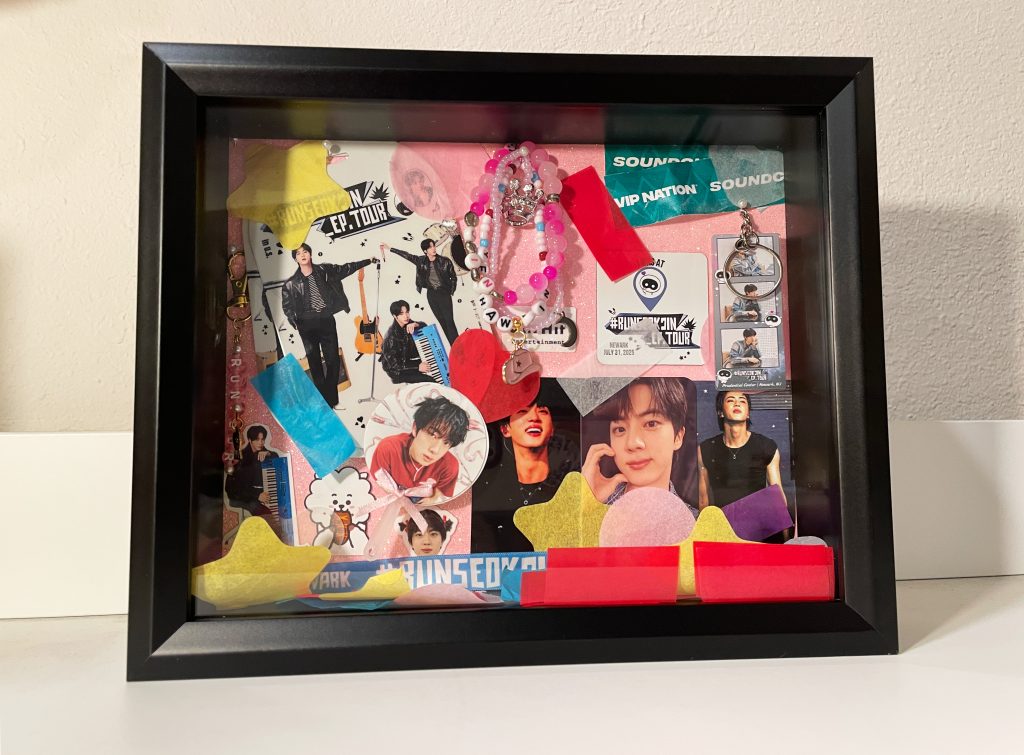
I made a shadow box for HOTS and loved it so much that I repeated the idea for Run Seokjin. And I just know I’ll do it again for the Arirang World Tour. (Hopefully I won’t run out of wall or counter space!)
Though a concert shadow box isn’t the hardest project out there, I thought I’d share my process to anyone new to the idea and offer some advice for materials and tools.
Let’s get to it? (C’mon wing!)
Picking a Shadow Box & Supplies
First off, you need to pick the type of shadow box you want to work with. There’s a ton out there in all kinds of sizes and colors. I felt that black would work best in my home because of other frames I already own and the likelihood of finding different sized shadow boxes in the future with the same finish.
I also chose the type of shadow boxes that have a velour backing, so that I could easily use short pins in my project. Ultimately, I used an 11×14 box for HOTS and an 8 x 10 for RSJ, both from Michaels. (Just a quick note that the VIP badge took up most of the space in the 8×10. So I would suggest this as the smallest size to use for VIP badges if you want anything else in the box.) There are a ton of other options out there from other retailers. It’s all about finding what works best for you.
Your supplies for your shadow boxes are going to vary based on what you want the box to look like in the end but here is what I’ve found I’ve liked.
Shadow Box Suggested Supplies list:
- A shadow box of your choice
- Freebies from the concert you want to display
- Concert items like VIP bracelets, confetti, physical ticket
- A pencil
- Scissors
- Pins (I like these ones because they’re shorter than typical sewing pins and I find them easier to use in a confined spaced.)
- An adhesive of choice. I use scrapbooking tape and photo sticker squares like these.
- Optional: Cardstock or fabric in the color of your choice to be the backing
Prepping Your Shadow Box
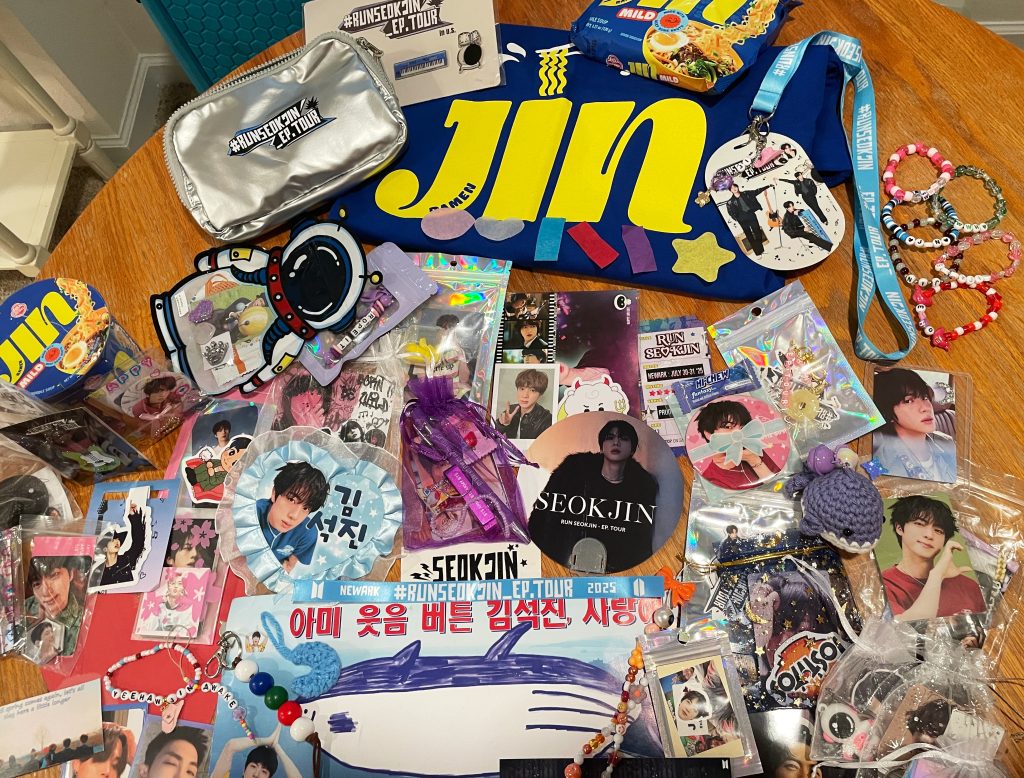
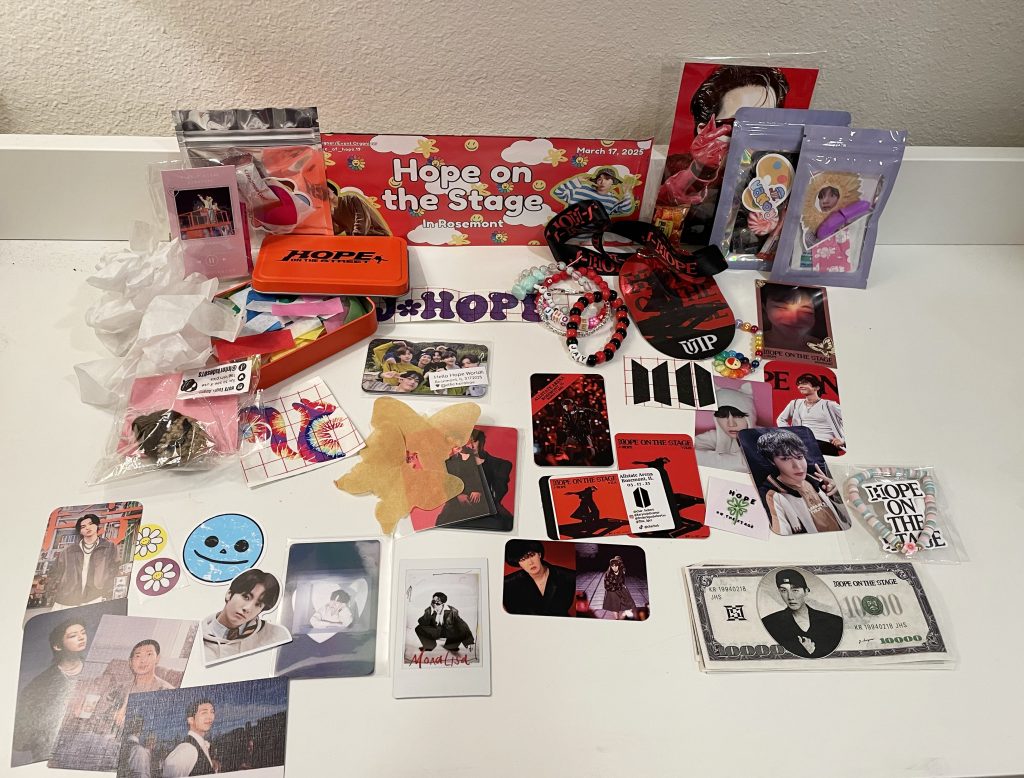
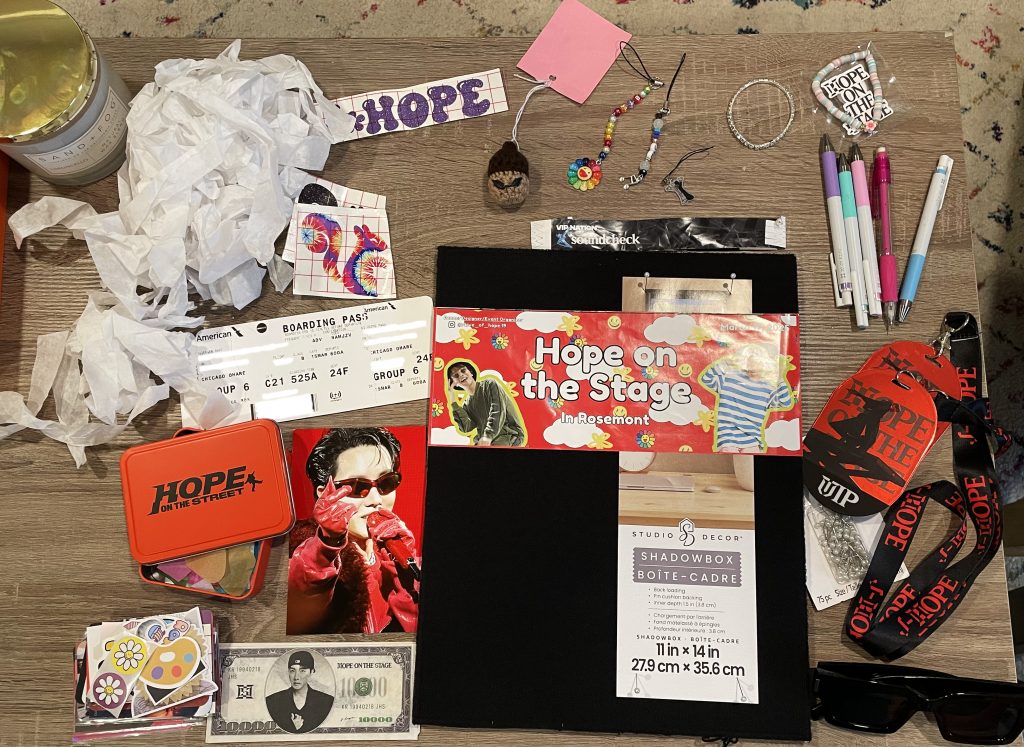
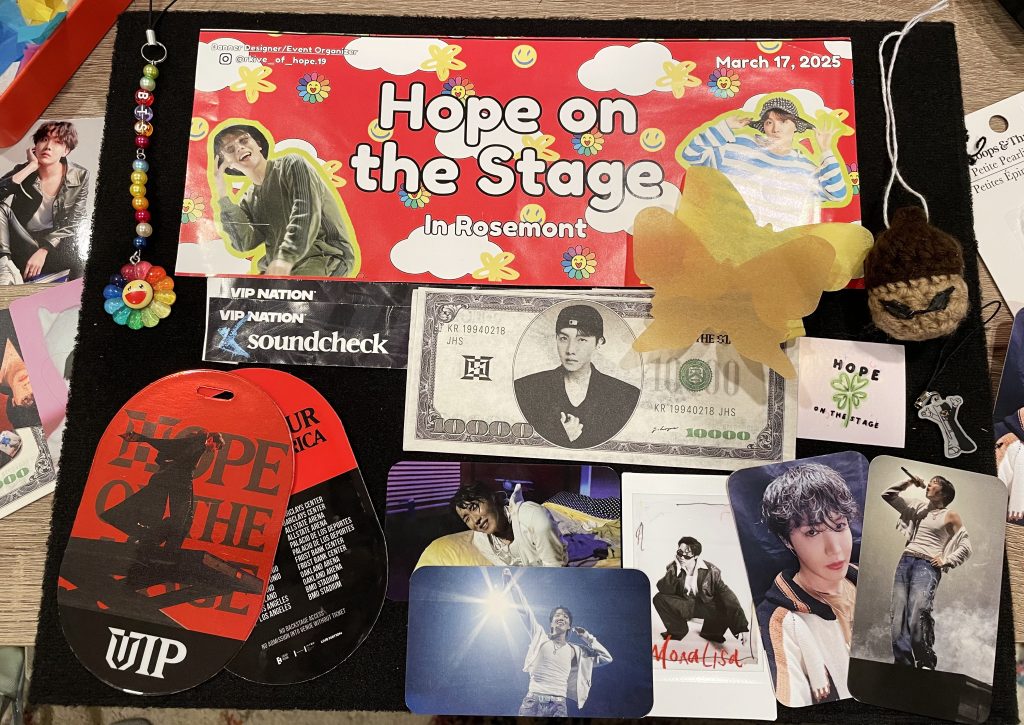
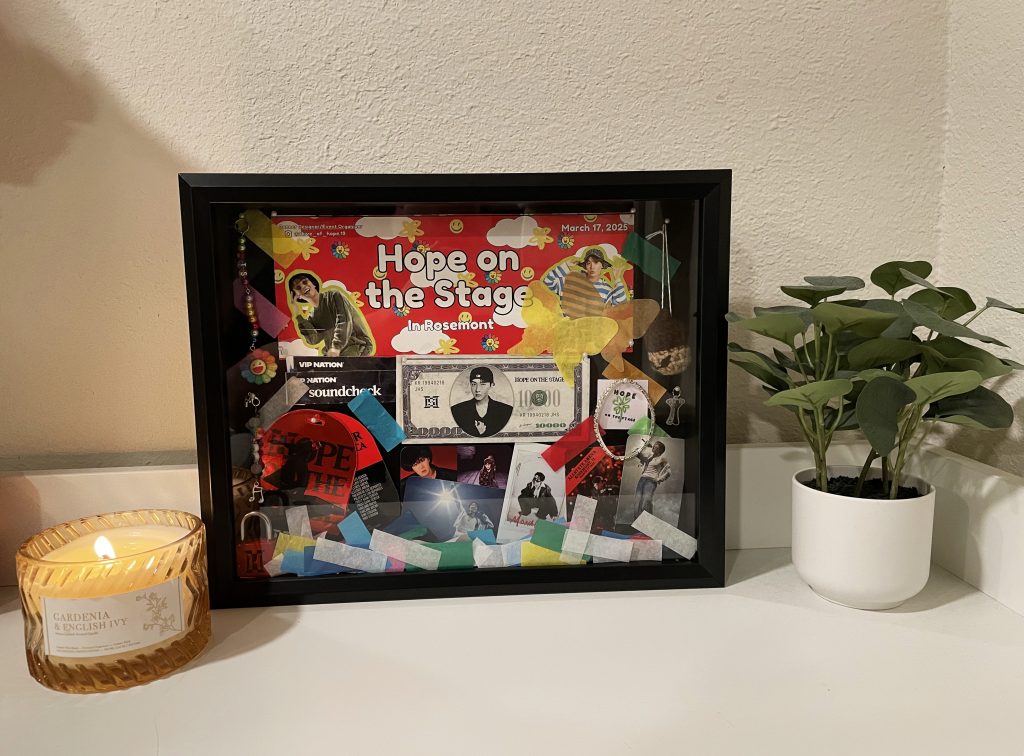
To begin your shadow box project, I’d suggest gathering and sorting through everything you want to display in it. Compare their relative size to the shadow box you purchased and discern what will fit and what will not. I also try to find at least one thing that has the event’s date and name it that I make a priority to fit in the shadow box.
Decide, also, if you’re willing to cut and trim larger items to size to fit in the box. I get pretty attached to keeping posters, pcs and paper goods the exact way they were when I received them, so I have a very hard time cutting them. 🤣
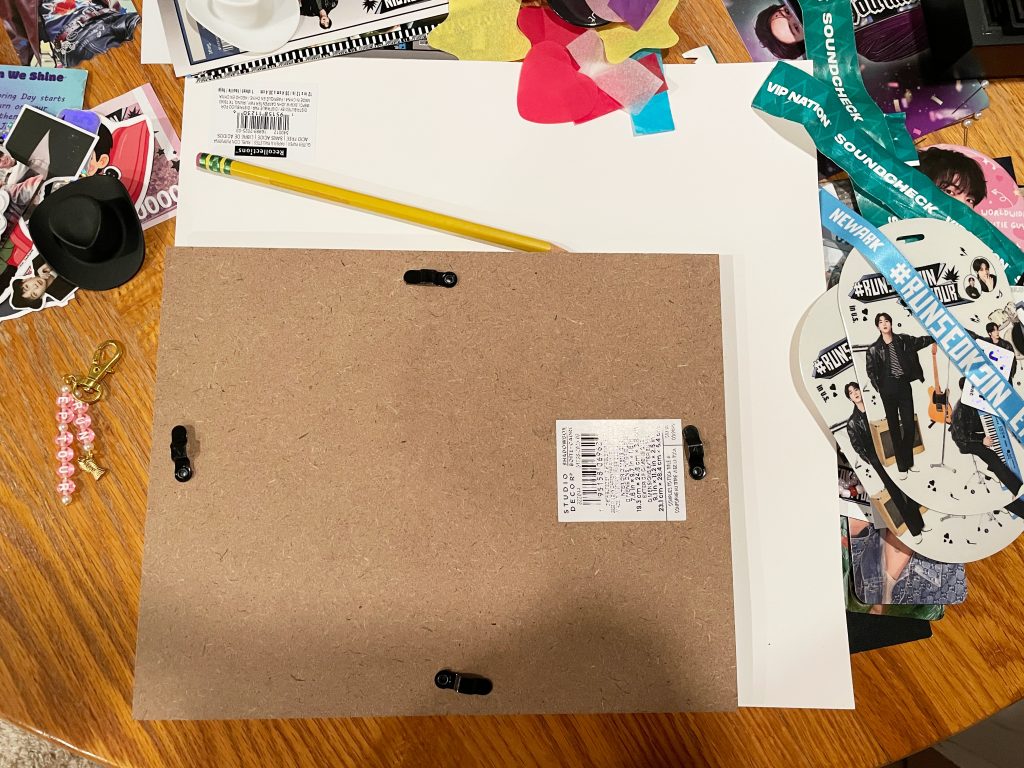
Next, open up your shadow box. Most boxes will have little metal prongs on the back you’ll have to slide out from under the edge of the frame to remove the backing. Set the glass side of the box aside somewhere it will be safe.
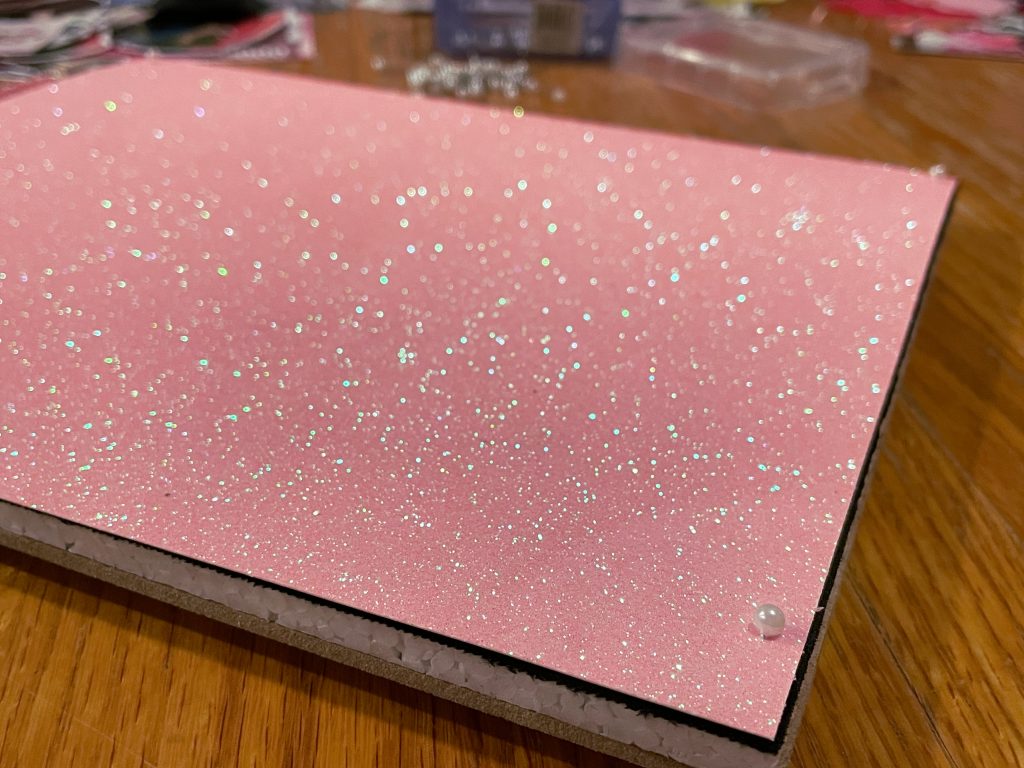
If you are using cardstock or fabric to cover the back for extra color, use the backing of the box to measure the right amount of material.
Assembling Your Shadow Box
I used pins to attach my cardstock to the velour backing, but you can also use a strong adhesive. I chose the pins so that I didn’t have to commit to the backing if I didn’t end up liking it.
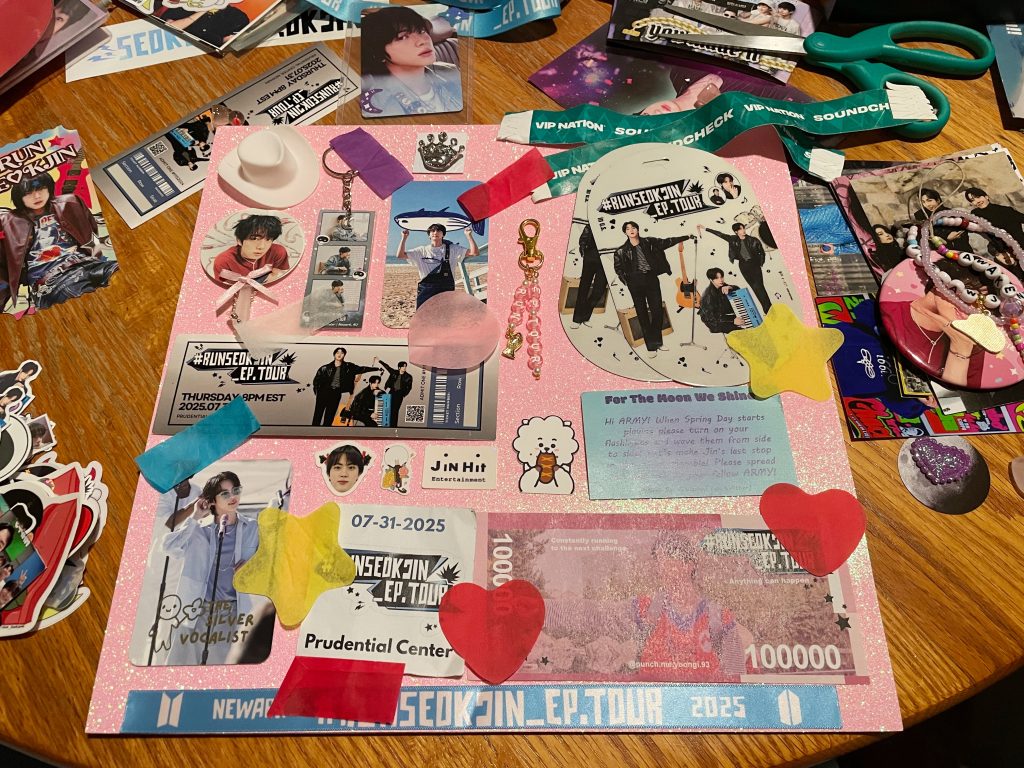
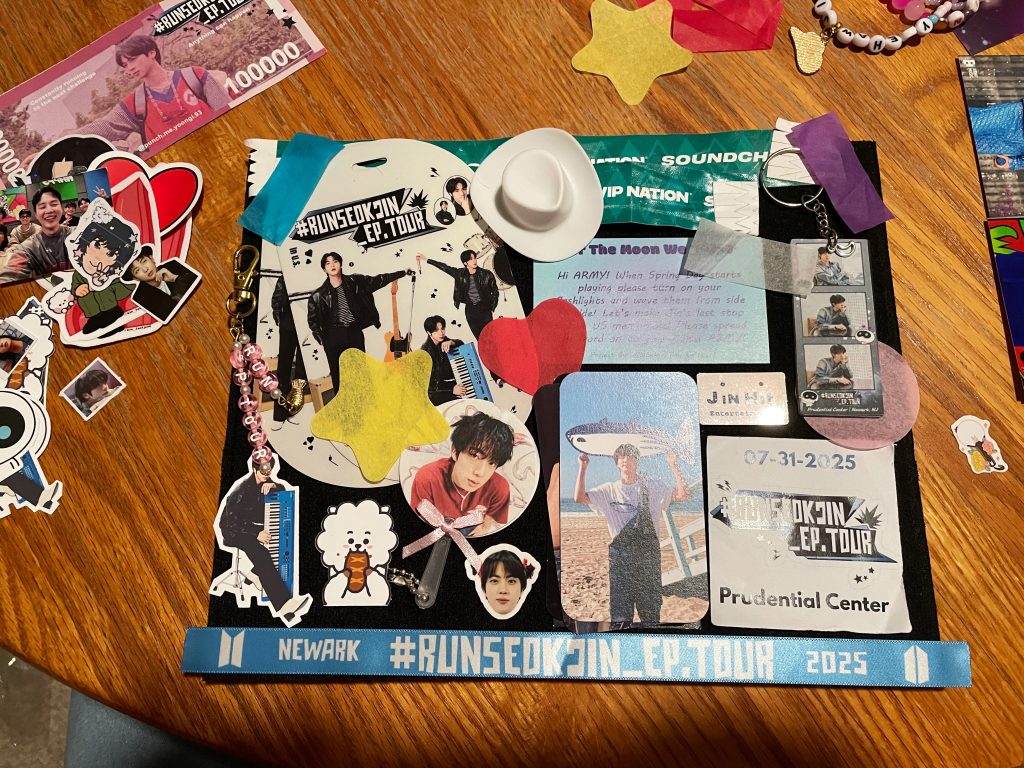
My biggest piece of advice is to play around with all the pieces you want to include in your shadow box as much as possible. But be sure to take a photo each time you’re happy with a design before changing to a new one. That way you can compare each iteration.
Be sure not to cut any of your paper goods until you’ve made a final decision!
I went through a bunch of different versions, trying out various layouts for each direction of the box.
Some things to keep in mind as your work on your designs: working in layers can add dimensions to your shadow box and not every single item has to be 100%. And don’t be afraid of whitespace!
Keep in mind how different ways of connecting your memorabilia to the backing can have different effects. And what kind of damage to your objects you’re okay with. (If you don’t mind small holes vs adhesive on the backs of things.)
When you’ve settled on a design, take a final photo to keep as reference as you construct your box.
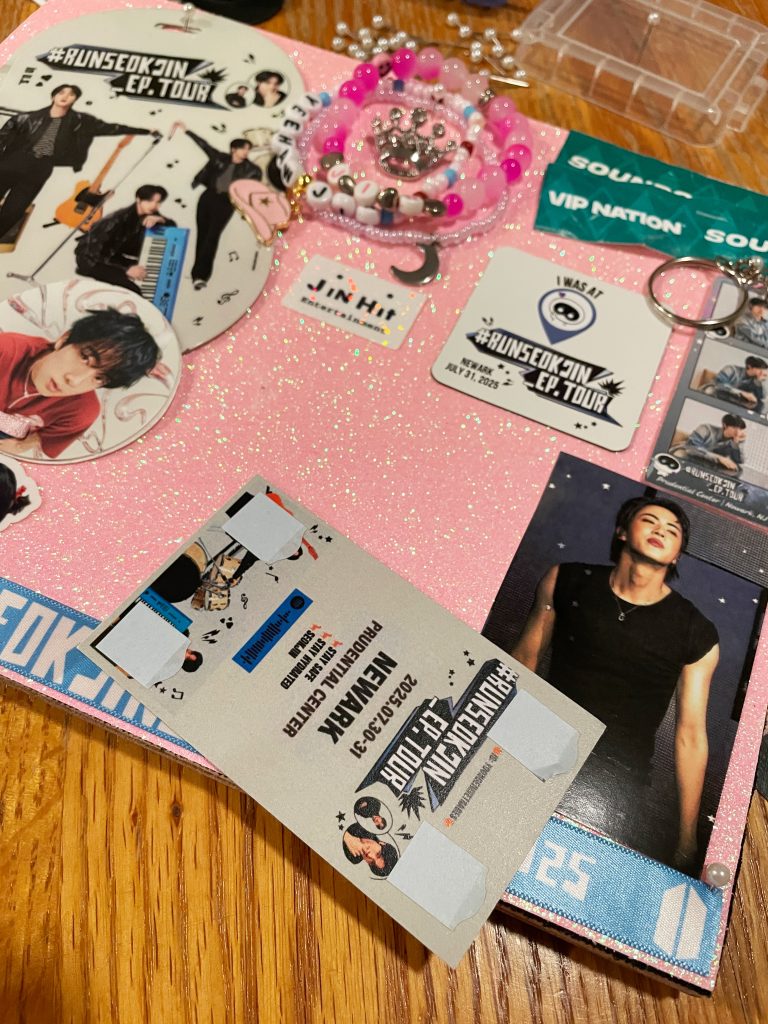
Once you’ve got everything situated the way you want, and you’ve taken your final reference photo, you can start attaching your items. You photo will be particularly useful if you have items layered as it will help you remember how things were stacked.
I liked to use scrapbooking adhesive and the photo sticker squares to connect and layer paper and flat plastic items. And use pins for anything hanging. If you want something to hang a specific way, you can add an adhesive as well to keep it in place.
For confetti-like objects I like to use scrapbooking tape or a glue stick to keep any pieces adhered in a specific place. Be patient and gentle with the confetti because it, like me, will tear under pressure.
When you’ve finished adhering everything, lean your backing up vertically to see if everything is sticking properly. If not, add more adhesive.
Be sure to check that the hanging brackets on the frame of the shadow box are pointing the way you want before closing the box! Then you can close up your shadow box by slipping the metal brackets back under the frame.
The backing may stick or be tough to put brackets back into place, but be gentle with them and cautious of jostling your frame too much.
If you like the way the confetti looks in my shadow boxes you can add some loosely to the bottom just before closing up the shadowbox. You can also place any trinkets you’d like to free-stand on the inside just before you close it as well.
And that’s it. Your shadow box is now ready to hang or sit where ever you’d like it.

I hope this tutorial/advice was helpful. And encourages you to be super creative with your own concert shadow box. Please let me know if anything wasn’t clear enough. Or if you have any questions!
And see you all on tour! I’m so lucky to say I’ll be at a couple stops. Hope to meet you and hand you a freebie. 💜